Showing posts with label plastic bags. Show all posts

Tuesday, April 17, 2012

04/14/2012 - Starbucks Wallet

Part 2 of the Starbucks experiment...which required buying a bag of coffee, but the bag was perfect for the face of the wallet. The green fabric was something random I came across. It was a half-sewn choir robe (or at least that is what looked like the intention) that someone donated to SCRAP. They get lots of fabric and do not accept clothing, but some pieces sneak in with the fabric and get donated to thrift stores. That is how I happened upon this unique fabric...oh, and if you plan to donate stuff, to SCRAP, be nice and don't try to sneak in clothing...even if it is half-sewn.

Reclaimed Material: coffee bag, coffee sleeves, choir robe, plastic bag
Other Material: none
Tools: scissors, ruler, sewing machine, thread, iron, parchment paper

How I did it: This was similar to the CD Cover Wallet with a few upgrades. I used the same measurements, but instead of using bias tape, I used the choir robe...the color matched perfectly. I didn't fuse the coffee bag since it essentially fused plastic and aluminum*. For the pockets, I gently peeled the corrugated side off of two coffee sleeves and cut them to size. I fused them with a few layers of plastic. I covered the outside coffee bag with the fabric so that there was a 1/4" overhang on the outside and stitched it into place, then repeated this for the smaller piece of coffee bag so that the fabric made a liner for the cash part of the wallet. Things got a little tricky with the cardboard pockets and putting the wallet together. I had to make my own bias tape to sew the two pockets together. I then stitched the pieces together similar to the CD Wallet, but then again, made strips of bias tape to cover the edges and did the final stitch work.

What I would do differently: I do love the contrast of the cardboard pockets from the coffee bag, but I would rather have used a coordinating color of bias tape because it would have been much easier. I have a bunch I bought from SCRAP...but none really matched.

*I was quite sure about coffee bags being made of fused plastic and aluminum, but did a quick search to double check. I came across some neat ideas for old coffee bags: Other uses for coffee bags.

Tuesday, March 20, 2012

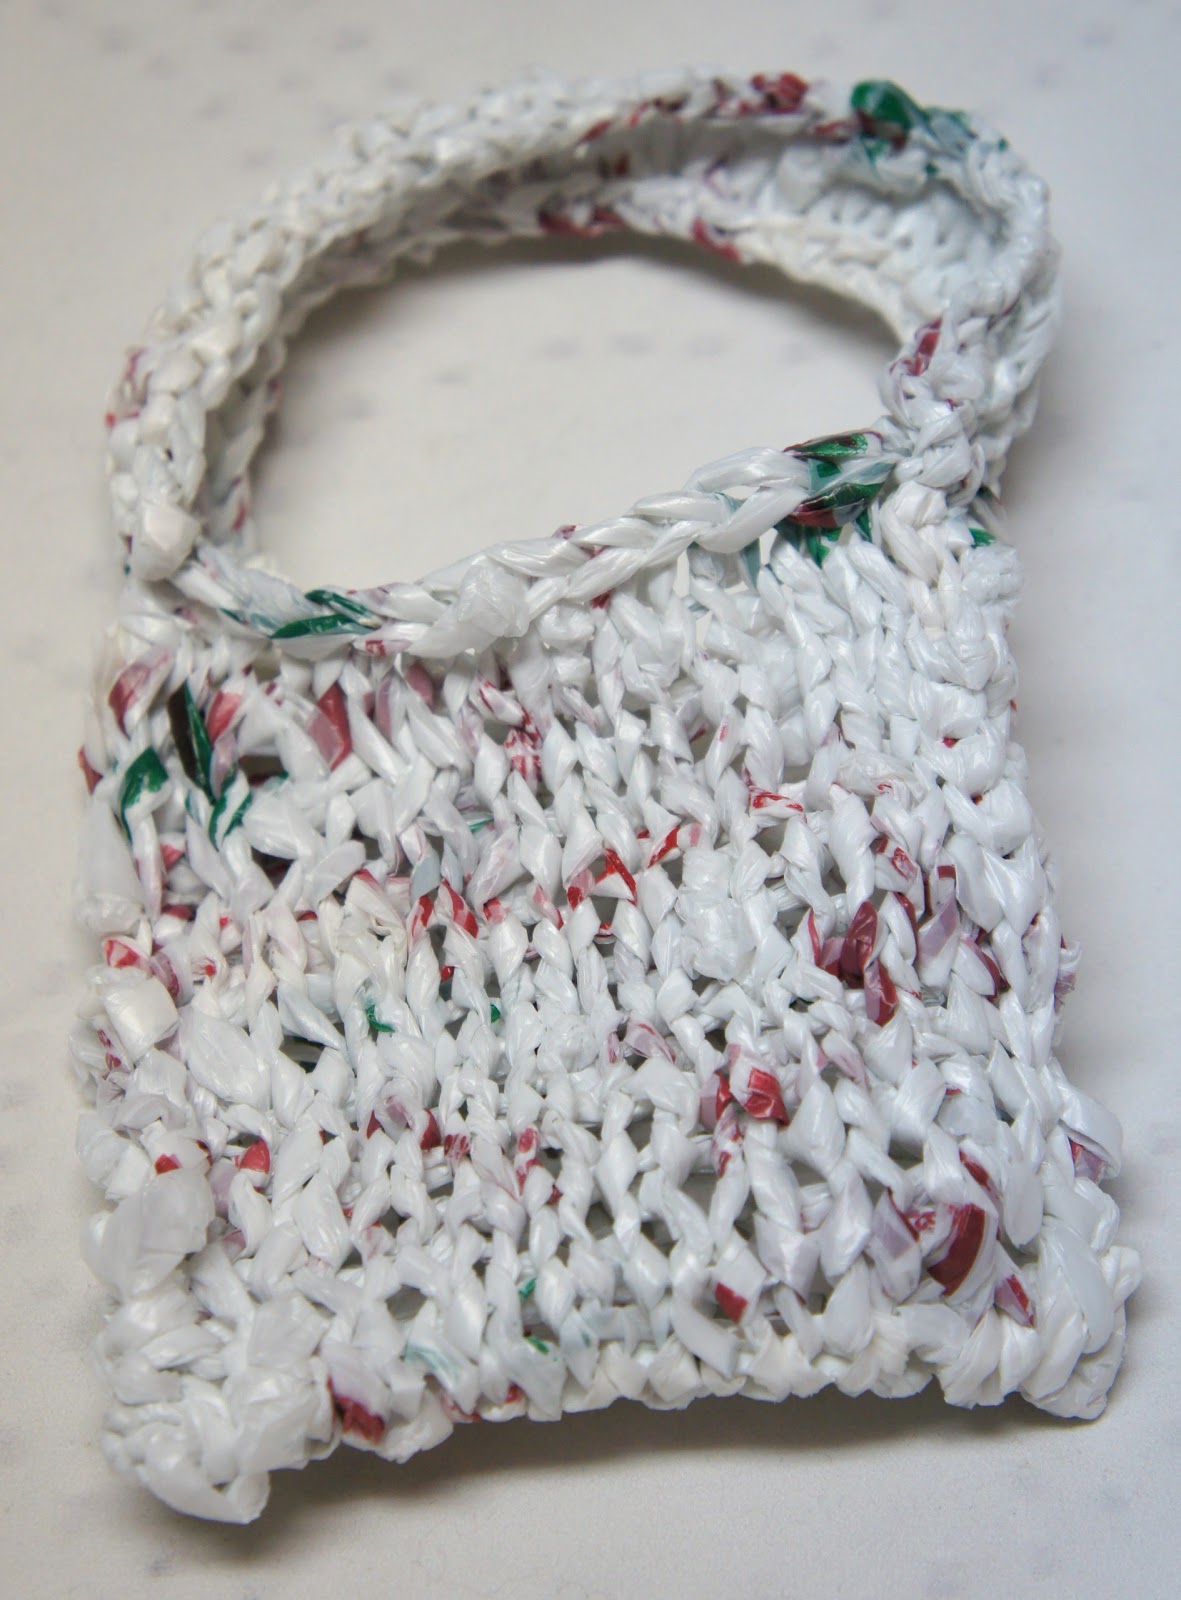
03/02/2012 - Handle for the Plarn Bag

Finally done with this little bag! Zoe was getting impatient to have it, but I had to make her wait until I got a picture of it.

Reclaimed Material: plarn
Other/New Material: none
Tools: scissors, knitting needles

How I did it: I knit the handle about 8" long and stitched it onto the bag.


What I would do differently: I really like to just sit and knit, but I don't know if I really care about making something with plarn again now that I have gotten it out of my system. Who knows though, I still have nine and half months of upcycled projects to do!

02/28/2012 - Plarn Bag - Part II

I took a break from my schoolwork to finish up the body of the plarn bag. It is surprisingly soft and squishy when knitted.

Reclaimed Material: plarn
Other/New Material: none
Tools: knitting needles

How I did it: Knitting, knitting and a little more knitting. I folded the knitted piece in half and used the cast on knit to hold the sides together.

What I would do differently: Finish?

02/25/2012 - Small Plarn Bag

I started this project in our car trip back to Chicago from D.C., but ran out of daylight to complete this bag, so this is Part I of the plarn bag saga.

Reclaimed Material: plarn
Other/New Material: none
Tools: chopsticks

How I did it: Since this was my first plarn knitting project I didn't want to make anything too big, so I decided on a small bag for Zoe. I started a regular knit with the plarn. I got about halfway done with the body of the bag before I lost my light. I was kind of relieved because we were pretty pooped from our trip.

What I would do differently: Like with the Mylar project, using real knitting needles.

Monday, March 19, 2012

02/23/2012 - PLARN!

Plastic + Yarn = Plarn. This plastic yarn was easier to make than I thought. There are lots of great things that knitters are making with this. I even heard of a Girl Scout group a few years ago collecting plastic grocery bags to turn into Plarn as part of a fundraiser...pretty cool.

Reclaimed Material: plastic grocery bags
Other/New Material: none
Tools: scissors 

How I did it: I thought that knitters made the plarn by cutting one long strip from each bag and tying them together as they went along, but this seemed so cumbersome, not to mention hard to get an even cut. I found these simple instructions: plarn making. I followed the instructions and rolled the plarn into a ball.

What I would do differently: I guess I could use newspaper bags for this too, but this seems like a good use of plastic grocery bags.

Monday, February 6, 2012

02/05/2012 - V-Day Garland


Since I have a little one now, I am trying to do a better job of decorating for the season/holiday, but I am also a cheapskate so I don't want to spend money doing so. My little Zoe got a sweet Valentine's package from some wonderful friends in Chicago and a 3 year old + gift bag = torn/crumpled gift bag that can't be reused. Most gift bags are paper covered in a plastic film, so they can't be recycled once they cannot be reused. 

Reclaimed Material: discarded gift bag, plastic grocery bag
Other/New Material: none 
Tools: scissors, hole punch

How I did it: The gift bag was covered in hearts so I just cut them out and was happy not to have to make a template. After I cut out the hearts I punched a hole on either side of each heart. I then cut off the handles of the plastic bag so the top was even, then began to cut the bag into a 1" strip around. I cut the bag kind of like an apple peel so I could have one long piece for the garland. I then strung the plastic "string" through the holes on each side of the hearts so that the long part of the "string" was behind the hearts. I tied loops on both ends of the garland and trimmed off the excess plastic "string" then hung it up. When Zoe got up in the morning she said "Mom, we have Valentine's decorations!"

What I would do differently: I saved the scraps from the bag that I cut the hearts out of, so I will end up using them for some other craft to celebrate this month-o-love.

Monday, January 23, 2012

01/22/2012 - Plastic Boa - oooh la la

Let's play dress up! I made this fun boa for my daughter who likes to dress up from being a princess to being an explorer. This is a surprisingly easy project that just about any age can do...you just need lots and lots of newspaper bags (thanks Mama Jan for saving them for me!). At the office building I worked at in Illinois, my coworkers and I used to grab all the bags (we didn't take their newspapers) from the other office suites on our way in everyday, so we amassed quite a collection. This doesn't have to be just for kids to use...this could be fun if you are trying to save money at a bachelorette party.

Recycled Material: plastic newspaper bags
Other Material: none
Tools: scissors 

How I did it: The first thing I did was take two of the plastic newspaper bags and cut them lengthwise so when I laid it out, the length doubled. There were seams on both sides that I used as a cutting guide. I bunched both pieces together lengthwise and tied them together to use as the base, leaving about 2" hanging off the knot and made the length about 4'. At first I started tying whole bags onto the base, but realized I would run out before I covered the entire base, so I folded the bags in half lengthwise and cut them in half. I then folded the smaller piece in half and tied it once around the base. I continued this until I covered most of the base leaving about 3" or 4" on both ends. I knotted the ends about 3 times in the same place to keep the smaller bags from sliding off and made sure that the knots of the smaller bags at the ends were really tight. I used the scissors to trim the bags down so they were all even and also to cut down the bag bottoms that were still intact. Once I trimmed the pieces down, I fluffed up the pieces and had a fun, flirty boa. I stashed the trimmings to use for a plastic fuse project later on down the road.


What I would do differently: This is a pretty easy project, so there isn't much that I would have done differently, other than paying attention to the order of colored bags. One side has more color than the other, but this is what happens when I am on a roll. This could be done using grocery bags or any other thin plastic bag, but would require a lot more cutting. This project is actually quite fool proof and easy to change anything you don't like. Once I get more bags, I am going to make a matching tutu.