Showing posts with label plastic. Show all posts

Sunday, April 8, 2012

04/05/2012 - Easter Grass

Easter grass...what a scam! Yes, it is cheap, but you are just buying shredded up bits of colored plastic that have no use other than cushioning the basket.

Reclaimed Material: plastic flower paper, Mylar balloon
Other Material: none
Tools: scissors 

How I did it: I folded flower paper (left over from making flowers) and folded it in half lengthwise again and again. I cut vertical strips, about 1/8" wide until all the paper was cut. For the Mylar balloon, I trimmed off the edges that were glued/melted together, then cut it the same way. I mixed the pieces together and ended up with some colorful and shiny Easter grass for Zoe's basket!

What I would do differently: A paper shredded would have made this process go faster, but ours cross shreds so it wouldn't have worked. No biggie because I only have one child to worry about. Colorful paper would work just as well.

04/04/2012 - Doll Skin Ring

I was cleaning the gunk out of my wedding band and one of the diamonds popped out. Thank goodness I was able to find the diamond before it disappeared. This is my replacement until I get the ring fixed...well not really, but the lack of a ring was my inspiration.

Reclaimed Material: discarded doll arm
Other Material: sparkly scrapbooking brad
Tools: scissors, sandpaper, super glue, X-acto

How I did it: I cut a ring from a baby doll arm using regular scissors. It is the same concept as the doll skin tattoo bracelet. I smoothed the edges with the sand paper and shaped it at the same time. I then removed the legs of the brad and noticed there were little prongs holding a plastic sparkle in place. I raised the prongs to insert into the ring and poked shallow slits where the prongs would be when pressed against the ring. I put a dab of super glue where the sparkle was going and pressed it into the ring and let it dry. 

What I would do differently: I am not really a fan of this ring...this would have been better if I had just drawn a design on it. There does not seem to be enough contrast on the "skin" with the brad on it.

Thursday, April 5, 2012

04/02/2012 - Noah, the finger puppet

Zoe gave me this idea by grabbing one of the ends I cut off of an inner tube during the big basket project. She put one on her finger and walked around saying she had a finger puppet. She also named this little guy. I told her I made the finger puppet for her. She looked at it skeptically and said, "his name is Noah." Then she snatched out the green hair and said, "because he has NOAH hair." This is what she gets from the Bible stories I tell her?

Reclaimed Material: rubber inner tube, button, plastic bottle ring, green thingie
Other/New Material: none
Tools: scissors, Sharpie, X-acto knife

How I did it: The tube was already cut to the size I needed and I had already cut skinny little strips. I used the X-acto to cut little notches along the top to string the skinny rubber strip through to bring the top together around the hair that was going to be pulled out anyway. I cut two more notched to sew on the button, using the rubber strip. After cutting two more notches for the mouth placement, I cut the plastic ring in half. The ring had little flaps on it, so I notched them on each side to hold the mouth in place after I tucked it into the rubber. I drew a black circle on the button to make the eye and gave Noah to Zoe the next morning.

What I would do differently: It would be fun to make more Zoe-approved puppets.

Wednesday, April 4, 2012

04/01/2012 - Bicycle Basket

This was a new basket that was turned into a recycled project. That normally goes against what I am trying to do, but this was for Jason's coworker. I guess she loves this style but the plastic weaving would always come loose, so she wanted it woven with rubber. I am a bit surprised at the transformation of this basket...it is cute as a button.

Reclaimed Material: rubber inner tubes, button
Other/New Material: plastic bicycle basket, safety pin
Tools: scissors

How I did it: I removed the plastic weaving from the basket then washed and cut strips of rubber to the same size as the plastic weaving I removed. I began weaving along the bottom and worked my way to the top. (The white vertical lines in the picture are part of the basket frame. I wrapped the top edge with rubber. I cut wider pieces of rubber and folded them in half, lengthwise, and did a twisty braid along the bottom and the top of the basket. I cut two different sized circles and cut them into flowers. I put the smaller one over the larger one and poked a small hole in the center and pushed the button (the kind with the mount on the back) through. I pulled the button notch through two lines in the weave and pinned it in place.

What I would do differently: I want to figure out how to make bicycle baskets using old bicycle spokes, but I think the spokes would need to be welded together. I couldn't resist adding the flower to the basket...I hope the coworker likes it.

Before
After

Sunday, April 1, 2012

03/12/2012 - Starbucks Earrings

I usually try to bring my own mug to get my coffee, but there are times I just need my caffeine fix without a cup handy. I have been collecting these "splash sticks" (I think that is the fancy name Starbucks has come up with for these) got quite a while now. The moral of the story is that you should bring your own cup if you are going to buy coffee.
 
Reclaimed Material: coffee splash sticks, heart bead stoppers
Other/New Material: earring hooks, jewelry wire
Tools: jewelry pliers, looping pliers, clippers, drill

How I did it: I clipped off the stick part leaving about 1/8" to drill a hole to hang the bead under the Starbucks mermaid lady. Next I drilled holes using a tiny bit on the remaining stick sections. I also drilled a hole on the top of each lady. Next, I made 4 loops to connect the pieces of the earrings together. I connected the earring hook to the green mermaid lady using a loop, then used another loop to connect the heart beats at the bottom and repeated with the other earring.

What I would do differently: I originally wanted to use a colored bead, but decided to use these random heart things. As far as the heart bead stoppers, I am counting them as reclaimed/upcycled because they were holding some faux pearls on a string when I bought them. But I am still riding the fence on calling it upcycled. I need to come up with something that uses the whole stick, or maybe just the stick part.

Friday, March 30, 2012

03/10/2012 - Plastic Flowers


I can't stop making these flowers! I saved the colorful plastic that comes with flowers from the D.C. trip. I think the airline baggage inspectors thought I was a nut job bringing home a suitcase half full of garbage. I couldn't decide which Zoe picture to use so I have a couple of her. She is becoming a ham with the pictures.

Reclaimed Material: plastic papery flower wrap, toy wire, ribbon
Other/New Material: none
Tools: scissors, glue

How I did it: Just like the paper flower wreath, I cut out squares of the plastic and then cut it in a circular swirl. I rolled the pieces and viola...flowers. I used the toy wire as the stems and glued the center of each flower to a piece of toy wire. I then recoiled the flowers and glued the end around the base of the flower by the wire to keep it from uncoiling. I tied them together with a piece of ribbon from a balloon to hold the bouquet together.

What I would do differently: I am not sure what I am going to do with the flowers yet, but they are just fun to do. Zoe is really enjoying playing with them. I think I am going to use the rest of the plastic and scraps to make "grass" for Zoe's Easter basket.

03/08/2012 - Plastic Ornament

UPDATED: In case you already looked at this, I have updated it with pictures now....yeah me! I am not really sure what this should be called...so I am calling it an ornament. I have seen something similar with paper, so why not plastic?

Reclaimed Material: #2 plastic yellow and white containers, toy wire
Other/New Material: none
Tools: scissors, paper, hole punch

How I did it: I cut a stencil from the paper in the shape of an elongated eyeball - I believe that is the technical term, about 3" long. I cut out about 7 of these pieces in each color because I wasn't sure how many I would need. I punched holes on each end of the pieces. I bend the toy wire on one end and made a couple coils then pulled it through the holes on one end of the pieces, alternating the white and yellow. I pulled the piece from the bottom of the stack and pulled the wire through the hole on the other end, and continued this. I had to pinch the pieces so they would stay in place.

What I would do differently: Since I finally found the ornament this needed to be updated. Because of the thickness of the plastic I used the pieces stair stepped so when the last piece and the first piece met, there was a gap. I think a thinner plastic should be used or the pieces need to be cut bigger.

Tuesday, March 20, 2012

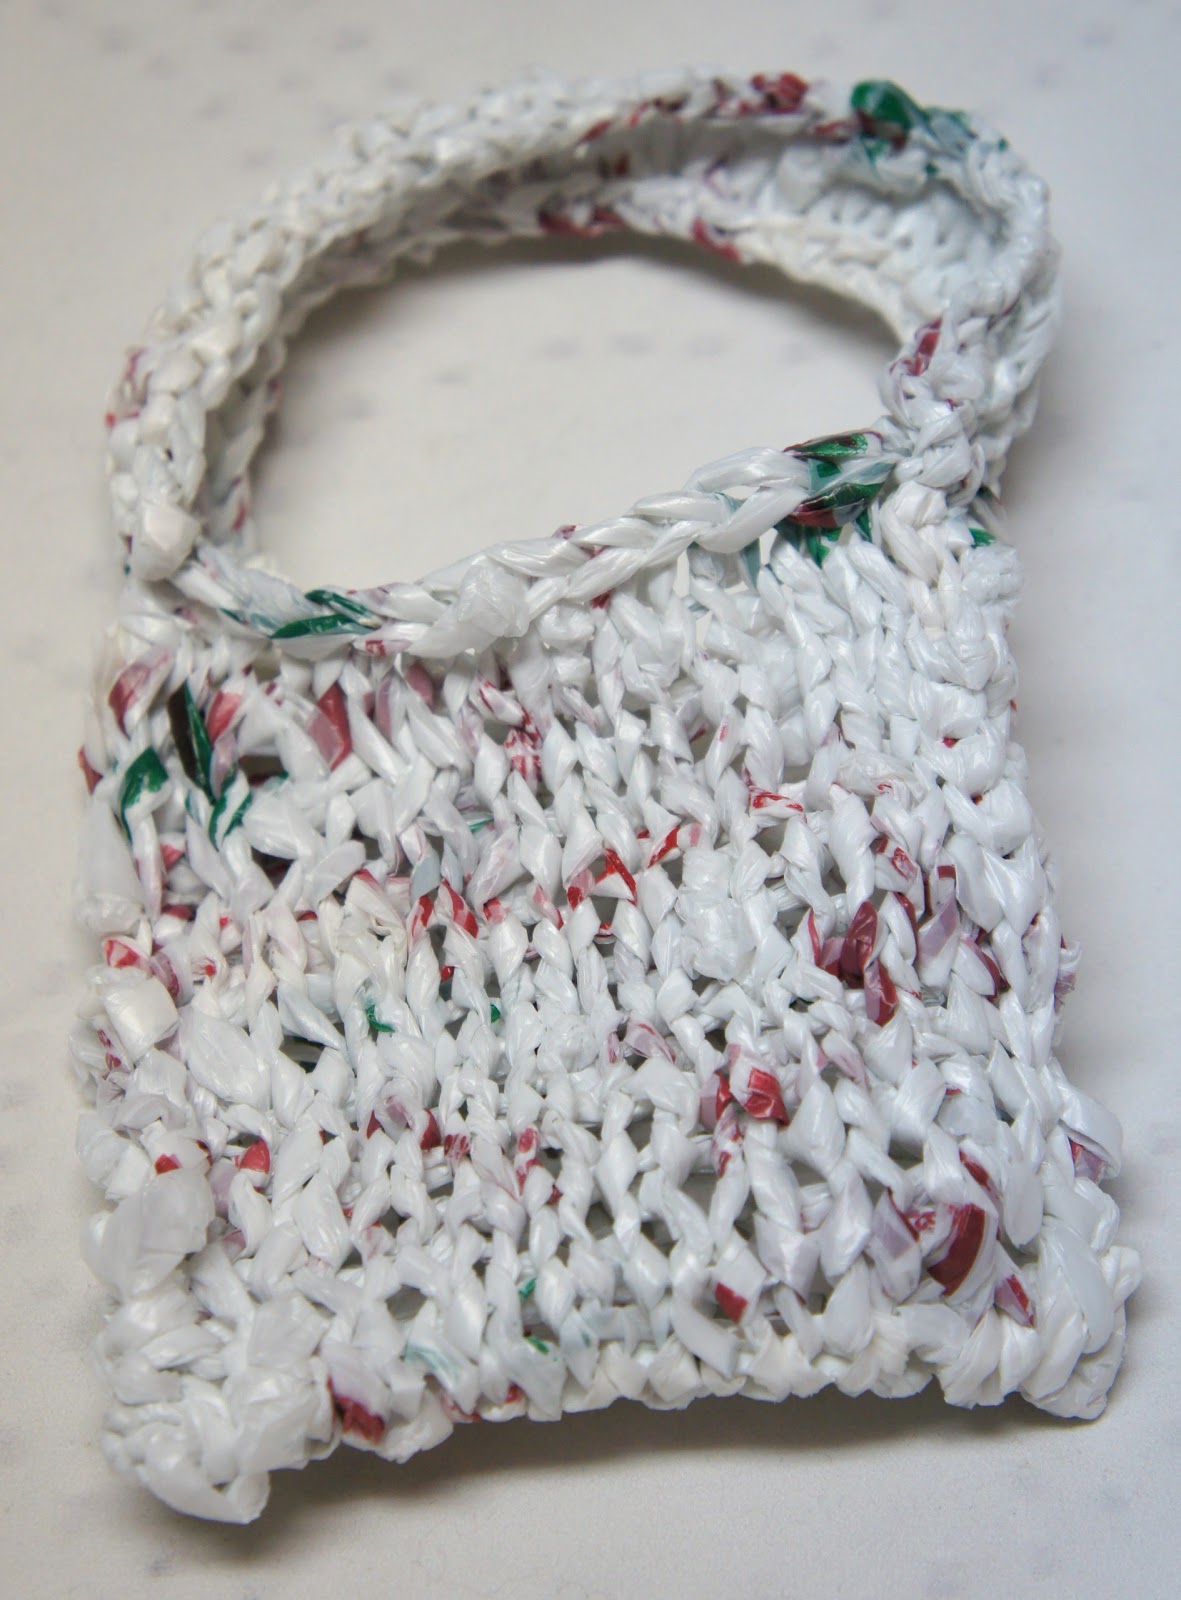
03/02/2012 - Handle for the Plarn Bag

Finally done with this little bag! Zoe was getting impatient to have it, but I had to make her wait until I got a picture of it.

Reclaimed Material: plarn
Other/New Material: none
Tools: scissors, knitting needles

How I did it: I knit the handle about 8" long and stitched it onto the bag.


What I would do differently: I really like to just sit and knit, but I don't know if I really care about making something with plarn again now that I have gotten it out of my system. Who knows though, I still have nine and half months of upcycled projects to do!

Monday, March 19, 2012

02/24/2012 - Plastic Flowers

Hotel crafting anyone? I have a slight Dr. Pepper addiction and never realized how cool the scalloped design on the top of the bottle was.

Reclaimed Material: plastic bottles with lids
Other/New Material: none
Tools: scissors, tape

How I did it: I used the imprint on the top of the Dr. Pepper bottle as a guide and cut around it to make the petals of the flower. I also cut a water bottle, but make up the petal cuts as I went along. I didn't have any glue just black electrical tape so I had to figure out how to attach the lids as the centers of the flowers without the tape showing. I cut a piece from the rest of the bottle and rolled it so it would fit snugly in the neck of the bottle. I folded the tape in half, sticky side out and wrapped it around the rolled piece of plastic and put the lid over the tape and repeated with the second flower.

What I would do differently: Absolutely would use glue instead of black electrical tape! I think these would make cute wine stopper tops by using old corks in the neck.

02/22/2012 - Mylar Balloon Camera Sleeve

Crafting on a road trip is not the easiest thing to do, well at least to do well. I had to get creative on this one. I found a Mylar balloon in the stockpile of goodies my sister had for me and combined it with a pair of disposable chopsticks (how is that for ingenuity?) from my mom to work on this project.

Reclaimed Material: Mylar balloon, potato chip bag
Other/New Material: none
Tools: scissors, wooden chopsticks

How I did it: Starting at the top of the balloon I cut into one side of the balloon and began cutting a horizontal strip then continued cutting it like an apple core to use as my "yarn". Using the chopsticks as my needles, I started knitting the balloon to make a sleeve for my sister's camera. The seams of the Mylar came apart in a couple places so I had to tie the pieces together. Unfortunately, I ran out of the Mylar before I was able to finish. Julie suggested using a chip bag to finish so I started the same process as with the Mylar and knitted the chip bag onto the Mylar. I used the potato chip "yarn" too stitch the piece into a sleeve.

What I would do differently: I have a habit of knitting really tightly, so chopsticks didn't really help. Using real knitting needles would be easier next time. (The picture was taken before the chip bag was added.)

Friday, March 16, 2012

02/21/2012 - Airline Food Plate

Long gone are the good ol' days of getting a free bag of peanuts or pretzels on airplanes. I bought one of the little snack packs on my flight to Chicago and it came with a little square plastic plate. It seemed a shame to throw it out so I stuck it in my bag. My artsy sister gave me access to her paints and paint brushes to keep up with my resolution during my visit. She also had a wonderful supply of cool garbage waiting for me to transform. Hooray Julie!

Reclaimed Material: plastic plate
Other/New Material: none
Tools: paint, brushes, painter's tape

How I did it: I taped the edges of the plate, then left a little space to paint a line then taped inside. I painted the line then let it dry. After the line dried I removed the tape and painted the design in the middle.

What I would do differently: I was happy to have access to my sister's supplies, so not much to do differently, except maybe lacquer it. I gave the plate to my mom to use as a little gift plate or something.

Friday, February 3, 2012

02/02/2012 - Bubble Wrap Checkbook Cover


I received two packages today that had silvery bubble wrap in it (that isn't all I received). I really liked the color so continued on the streak of melting plastic. Packing material is always a pain because there are not many recycling markets available for it. Usually you can take it to a shipping store, like UPS, and they will take it back for reuse if you don't have a crafty project in mind for the stuff.

Reclaimed Material: bubble wrap, clip on earring
Other/New Material: none
Tools: scissors, iron, ironing board, parchment paper, ruler, super glue

How I did it: This time I used parchment paper instead of cloth as the barrier between the iron and plastic and it worked out wonderfully. I didn't pop the bubbles in the wrap before because I wanted to see what would happen when I pressed the hot iron on it. When the bubbles melted they made a neat circle pattern in the melted plastic. I folded the piece of bubble wrap in half then melted it completely with the iron. I have found that if you over iron the plastic it gets a curdled look to it. I repeated the process with another sheet of bubble wrap then pressed the two melted pieces together. I then cut the piece down to 6.5"x9" and as you can see by the photo scalloped the edge that was going to be on top. I folded the plastic down to 3.5" with the bottom portion to be used between carbon sheets and the top as the cover. I then took one of the 6.5" long scraps I had trimmed off then folded it in half to about .5" and pressed it with the hot iron. I placed it lengthwise near the top of the middle section of the folded plastic piece melted the ends about .25" in to adhere it to the large plastic piece. This piece is to slide the back of the check book into. I also gently ironed the trimmed edges of the plastic to make sure that the pieces were fully melted together. The plastic was thick and the folds kept coming up so I put the parchment paper between the pieces and gently pressed the iron on the folds to hold them in place.

I removed the earring clip from the back of the earring (I was able to do this by hand by pulling it). I used super glue to press it to the front cover, but also pressed the plastic behind it with the iron to shape the decoration around the plastic.

What I would do differently: After I put the sparkle on the cover of the piece, I decided this might might make a fun clutch purse for another project. I think I am going to experiment sometime with grrrr...packing peanuts too.

Thursday, February 2, 2012

02/01/2012 - CD Cover Wallet

February is here and I have one month down of my New Year's Resolution! Hooray! This is a project I have been meaning to do for a long time. CD covers have the coolest artwork and when we consolidated our CD collection a few years back I save all the covers and neat artwork and gave away the cases (but now regret that :). I tried experimenting with fusing newspaper bags in the past, but would give up before I let the plastic get hot enough to melt. I had seen an awesome pattern for a fused newspaper bag messenger bag in the, sadly now defunct, Ready Made book which made me want to experiment with it. I am happy this finally worked and this process is pretty much like a homemade laminating machine, so if you want something laminated, this is an easy at home way to do it.

Reclaimed Material: old CD Cover, newspaper bags
Other/New Material: bias tape
Tools: scissors, iron, ironing board, sewing machine, thread, measuring tape, scrap cloth

How I did it: I sandwiched the CD cover inside the newspaper bag and then covered both sides with the cloth and used the iron to melt the plastic. I melted three layers on both sides of the cover, then repeated these steps on two more sheets that were included with the CD. I cut the outside of the wallet to 8.5"x3.5", then cut the next sheet to 3" and the last sheet to 2.5" using the same width of 8.5". I sewed the bias tape along the top edges of each of the these sheets, then stitched a little center left on the two shorter sheets to make little pockets. I made sure the pieces were flush along the bottom then wrapped the bias tape around the three remaining edges. I folded the piece in half and ended up with a rockin' wallet.


What I would do differently: Next time I will use parchment paper to melt the plastic bags to the paper. Also, I am going to use a thinner bias tape.

Wednesday, February 1, 2012

01/29/2012 - Contact Lens Case Locket

This is my "gift with purchase" project. I seem to have an abundance of contact lens cases that come with contact lens solution and the necklace and charm on the front of the case were "free" gifts my grandmother-in-law received for donating to various causes. She gave them to me because she would have discarded them otherwise. This is fun "locket" and can be used to keep anything from medication to even an extra contact lens.

Reclaimed Material: contact lens case, necklace, charm, wine bottle foil
Other/New Material: none
Tools: metallic paint, box knife, Dremel tool, super glue, drill


How I did it: This project required more heavy duty tool work than my other projects. The first thing I did was take the lids off the contact lens case and used the box knife to cut it in half. Not to state the obvious, but if you try this, please use caution when using any sharp objects. I made sure not to cut too close to the side I was using so that I had enough of a lip to drill a hole to hang the necklace on. I used the Dremel to sand down the sides to make the edges smooth, trying to keep the lip I cut even with the rest, other than the section that I was going to drill. I lightly sanded the back of the case so the paint would stick to the plastic. Once the edges were sanded, I used a tiny (1/16" ?) drill bit to make a hole for the finding (I believe that is the correct term for the little loop that connects the charm to the necklace). Next, I used a silver metallic paint and painted the base of the lens case and the lid. I tried not to get paint on the area where the lid screwed onto the base. After the paint dried, I glued the foil circle from the top of a wine bottle to the lid and then glued the charm on top of the foil. The charm had a little piece sticking off the top to hang it from a necklace, so I was able to easily bend it off with pliers and used the Dremel to smooth the edge. I then used one of the findings from another discarded charm and inserted it into the hole that I drilled in the lens case. I then threaded the necklace chain through the finding and viola, had a lovely waterproof locket. 
 
What I would do differently: If I make this again, I would use a different metallic paint. I think spray paint would look nicer than the paint I used. I also don't think it was really to sand the plastic since it won't be getting heavy duty use and the back looks like it was sanded.

Friday, January 27, 2012

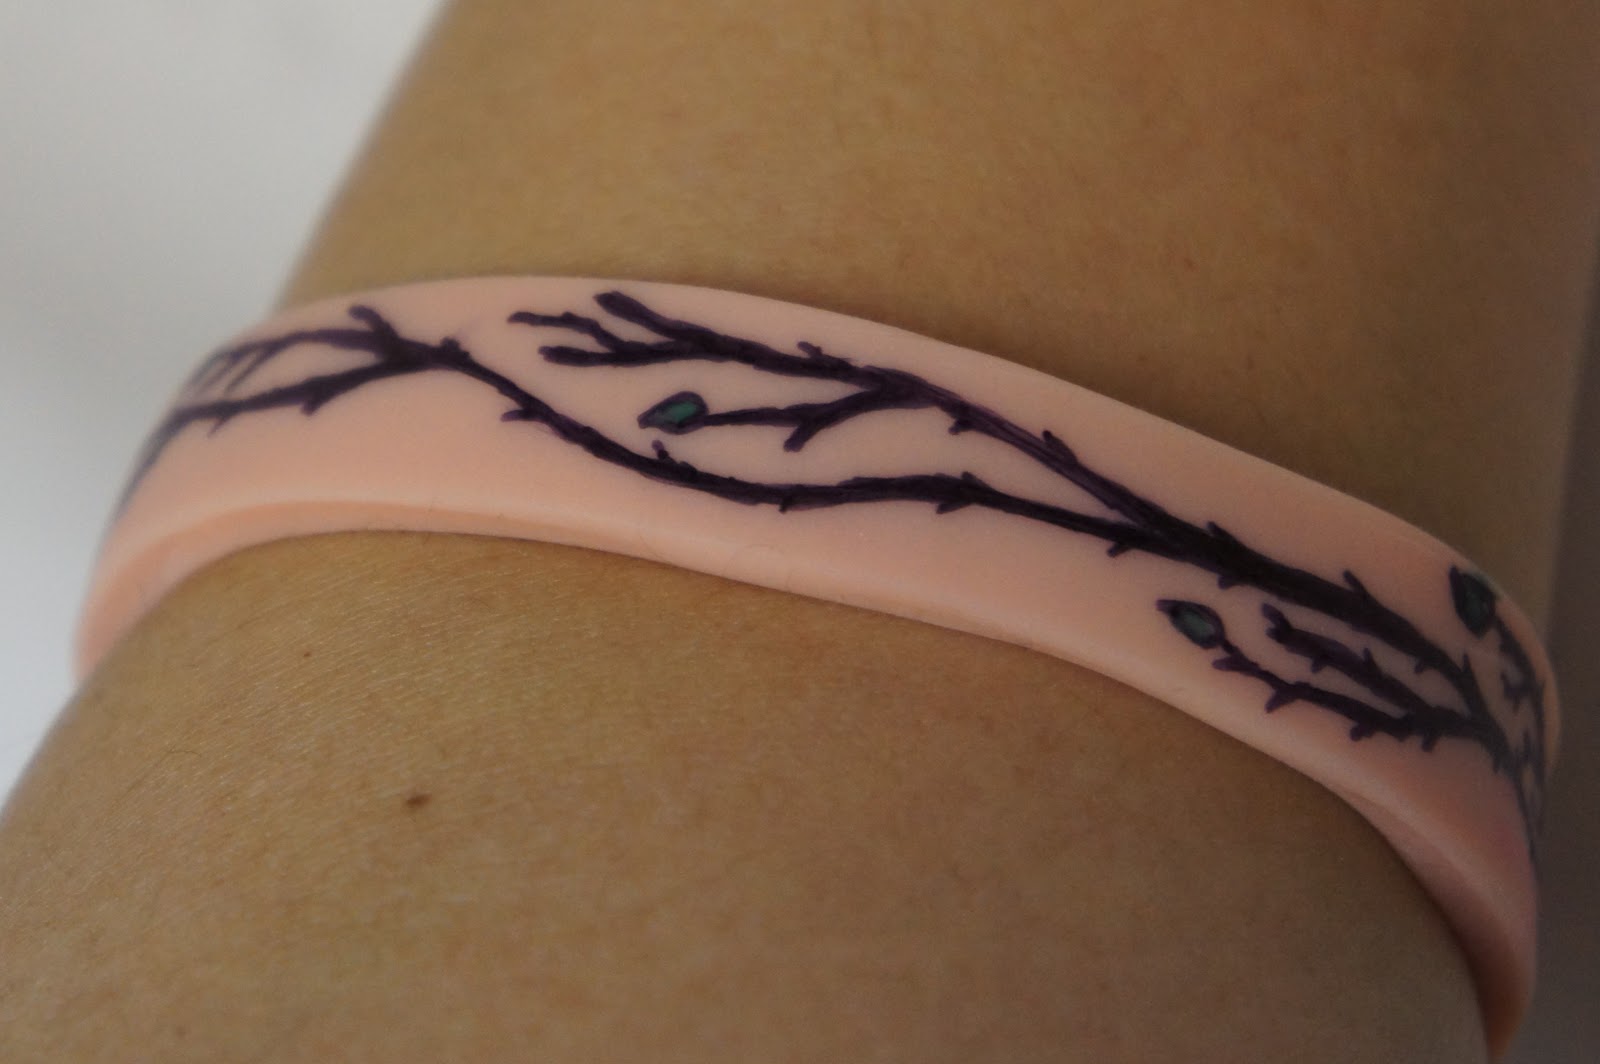
01/26/2012 - Doll Skin Tattoo Bracelet

I know the title sounds morbid, but really, it is just plastic. I have been wanting to do something with doll parts that I had and this is what I came up with. I figured if kids like to color and draw on their plastic dolls, I would give it a try too. Also, if you don't want a tattoo, you can use doll skin as an alternative lol. 


Reclaimed Material: discarded doll torso
Other Material: none
Tools: scissors, nail file, Sharpie markers 

How I did it: I cut a ring from the torso of the doll body about 1/2" wide. The plastic was a bit thick, so the edges were not clean. I used a nail file to smooth the edges. I drew the tree branch design around the bracelet then decided it needed a little color and added little green leaves.

What I would do differently: I couldn't find the sandpaper, so I used a rough nail file, next time, I will save the file and use sandpaper. Maybe the doll arms would make good rings.

Thursday, January 26, 2012

01/25/2012 - Plastic Lid Quote Magnet

This wasn't as ambitious as the previous project, but was still fun. I was originally going to make a photo frame, but changed my mind when I saw this neat picture in an old newspaper and the car reminds me of my new home, Oregon. This is an easy craft for everyone. 

Recycled Material: plastic lid, newspaper, cardboard
Other Material: clear nail polish, magnet
Tools: X-acto knife, glue, Sharpie marker, paint pens

How I did it: I used a lid from an empty raisin container and cut out the inside, leaving about a 1/8" border from the rim. I then cut the cardboard and newspaper to fit tightly inside the lid and glued the paper to the cardboard. I used the paint pens and Sharpie to add small touches of color to the picture then popped it into the back of the lid. There is probably a better way to do this, but I squeezed some good ol' Elmer's glue along the edges between the cardboard and plastic to hold it in place and wiped off the excess. I cut a magnet sheet to fit and glued it onto the back of the cardboard and let it dry. The picture was still missing something so I painted it with clear nail polish. I liked the effect because it pulled the newspaper print from the back side and gave the car a little more personality.
 
What I would do differently: I cut the plastic by hand, but next time I will use a straight edge to get a nice cut.

Monday, January 23, 2012

01/22/2012 - Plastic Boa - oooh la la

Let's play dress up! I made this fun boa for my daughter who likes to dress up from being a princess to being an explorer. This is a surprisingly easy project that just about any age can do...you just need lots and lots of newspaper bags (thanks Mama Jan for saving them for me!). At the office building I worked at in Illinois, my coworkers and I used to grab all the bags (we didn't take their newspapers) from the other office suites on our way in everyday, so we amassed quite a collection. This doesn't have to be just for kids to use...this could be fun if you are trying to save money at a bachelorette party.

Recycled Material: plastic newspaper bags
Other Material: none
Tools: scissors 

How I did it: The first thing I did was take two of the plastic newspaper bags and cut them lengthwise so when I laid it out, the length doubled. There were seams on both sides that I used as a cutting guide. I bunched both pieces together lengthwise and tied them together to use as the base, leaving about 2" hanging off the knot and made the length about 4'. At first I started tying whole bags onto the base, but realized I would run out before I covered the entire base, so I folded the bags in half lengthwise and cut them in half. I then folded the smaller piece in half and tied it once around the base. I continued this until I covered most of the base leaving about 3" or 4" on both ends. I knotted the ends about 3 times in the same place to keep the smaller bags from sliding off and made sure that the knots of the smaller bags at the ends were really tight. I used the scissors to trim the bags down so they were all even and also to cut down the bag bottoms that were still intact. Once I trimmed the pieces down, I fluffed up the pieces and had a fun, flirty boa. I stashed the trimmings to use for a plastic fuse project later on down the road.


What I would do differently: This is a pretty easy project, so there isn't much that I would have done differently, other than paying attention to the order of colored bags. One side has more color than the other, but this is what happens when I am on a roll. This could be done using grocery bags or any other thin plastic bag, but would require a lot more cutting. This project is actually quite fool proof and easy to change anything you don't like. Once I get more bags, I am going to make a matching tutu.

Saturday, January 21, 2012

01/20/2012 - Keepsake Tin

Altoids® tins are quite wonderful...first they are filled with a curiously strong mint, then you are left with a handy little contraption that has all sorts of uses and they are fully recyclable. My collection of the tins has grown over the years and I kept thinking, one of these days I will make something fun with those. The original plan was to build my house work robot, but I am just sticking to decorating it for keepsakes for now.


Recycled Material: Altoids® tin, metal scraps, random bits from SCRAP, #2 plastic lid
Other Material: spray paint, paint pen
Tools: painter's tape, hot glue gun, scissors, cardboard box or newspaper


How I did it: I used the painter's tape to tape down the overlapping edge on the bottom of the tin where the lid closes then used leftover black spray paint to paint the outside of the tin and let it dry. While it dried, I used another Altoids® tin as a template to trace the raised border on the lid onto the plastic lid. It was helpful that I could see the border through the lid and marked and cut the border shape, the trimmed the piece a little bit smaller than the tin border. I was going to leave the blue lid as it was, but ended up using a gold paint pen to color it because my random scraps had a gold-ish theme. Once the tin was dry, I used the gold paint pen to paint the raised border on the tin. I hot glued the plastic piece to the tin and let it set. After arranging the random bits, I hot glued the pieces on and let them set. The tape was removed and I let the tin dry completely. There was a hot glue blob that escaped from under the plastic and when I pulled it off, some of the black paint came up with it. This worked out because I ended up making random scratches on the paint to go with the worn look of the decorative pieces.


What I would do differently:  The nice thing about this project is that there are so many ways to do this differently. This could be done as a kid's craft by gluing paper over the brand cover or painting it by hand. Just about anything can be used to decorate the tin. I am happy with the scraps I found and used and they are meant to represent what can be stored in the tin. Lots of fun and I recommend giving this a try with your own spin!

Wednesday, January 18, 2012

01/11/2012 - Pink Fused Plastic Gift Bag

I got a pink plastic bag from a local cake decorating shop (yes, I forgot my reusable bag) and it seemed wrong not to make it into something else. I have tried unsuccessfully to make fused plastic crafts before so I am happy this finally worked.

Recycled Material: pink plastic bag
Other Material: none 
Tools: iron and board, scissors, tape measure or ruler, scrap cotton or linen, 2" thick box 

How I did it: The first thing I did was flatten the bag (about 18"x24") and trimmed off a long strip from the side 2" thick for the handle. After my iron was hot I laid the remaining part of the bag on the ironing board and covered it with the cloth, then ironed the bag to fuse the sides together. If you try this, make sure you keep the iron moving or you will have a plasticy mess on your hands, not to mention the smell. I ironed the piece for a few seconds then let the plastic rest for a moment before peeling off the cloth. The plastic shrunk about a third of the size and hardened a bit. I think it would have hardened more if I kept ironing, but I didn't want it to be too stiff. It was also puckered and wrinkled, so I will need to keep practicing to figure out other textures. Then I ironed the long strip for the handle to the texture I wanted.

I trimmed the large piece of plastic to 9"x10" then measured and marked 4" in on both ends of the 10" side  and folded them up to be the front and back of the bag. The plastic was surprisingly easy to crease. Next I measured and cut 2" in on each crease then folded the 2" pieces all around then folded the pieces to overlap like a "U" shape looking at it from the side. This is where it got tricky and the 2" thick box came in (I had to cut a small box to use). I put the box inside the bag and butted it up against the 2" side and covered the plastic with the cloth to fuse the flaps together with the iron. I made sure the sides were fused before adding the handle. This part took a longer to fuse because of the thickness and (I am assuming) because the plastic had cooled. I then put the handle inside the bag centered on the 2" piece then fused it with iron the same way and repeated it on the other side.

What I would do differently: I need to spend more time fusing different types of plastic. There really isn't anything I would do differently since it was a simple concept that was a little harder to execute than I expected.

Thursday, January 12, 2012

01/03/2012 - Plastic Ring Bracelet

If you like Dr. Pepper, you may recognize these rings. I have been saving these rings for while now trying to come up with something fun to do with them. This would probably be a great project for kids, except using ribbon or yarn to connect the rings instead of jewelry wire.
Recycled Material: plastic bottle rings
Other Material: jewelry wire
Tools: long nose pliers with clippers, cuticle clippers, thin barrel (like a pencil)

How I did it: First I prepared the jewelry wire by creating little rings by tightly wrapping the wire around a pencil and created 10 rings (I made a couple extra in case I messed anything up). I slid the wire off and snipped each of the pieces in the same spot with the needle nose pliers. I am a newbie at wire wrapping, but I was told that you open the ring one toward you and one away from you. If you pull it open outwardly it won't ever close back properly.
All of the rings had sharp little notches inside them so I used the cuticle clipper to snip them off...and that really was not fun. If you decide to try this, I highly recommend using plastic rings without the sharp notches. I attached the rings using the wire rings I made. I also clamped done around the wire rings to help make them stronger...also something I had heard.

What I would do differently: Unless I am really bored, I won't use the sharp notched rings again. Milk rings and other plastic rings aren't as aggressive as the Dr. Pepper bottle rings.