Showing posts with label fabric. Show all posts

Tuesday, April 17, 2012

04/14/2012 - Starbucks Wallet

Part 2 of the Starbucks experiment...which required buying a bag of coffee, but the bag was perfect for the face of the wallet. The green fabric was something random I came across. It was a half-sewn choir robe (or at least that is what looked like the intention) that someone donated to SCRAP. They get lots of fabric and do not accept clothing, but some pieces sneak in with the fabric and get donated to thrift stores. That is how I happened upon this unique fabric...oh, and if you plan to donate stuff, to SCRAP, be nice and don't try to sneak in clothing...even if it is half-sewn.

Reclaimed Material: coffee bag, coffee sleeves, choir robe, plastic bag
Other Material: none
Tools: scissors, ruler, sewing machine, thread, iron, parchment paper

How I did it: This was similar to the CD Cover Wallet with a few upgrades. I used the same measurements, but instead of using bias tape, I used the choir robe...the color matched perfectly. I didn't fuse the coffee bag since it essentially fused plastic and aluminum*. For the pockets, I gently peeled the corrugated side off of two coffee sleeves and cut them to size. I fused them with a few layers of plastic. I covered the outside coffee bag with the fabric so that there was a 1/4" overhang on the outside and stitched it into place, then repeated this for the smaller piece of coffee bag so that the fabric made a liner for the cash part of the wallet. Things got a little tricky with the cardboard pockets and putting the wallet together. I had to make my own bias tape to sew the two pockets together. I then stitched the pieces together similar to the CD Wallet, but then again, made strips of bias tape to cover the edges and did the final stitch work.

What I would do differently: I do love the contrast of the cardboard pockets from the coffee bag, but I would rather have used a coordinating color of bias tape because it would have been much easier. I have a bunch I bought from SCRAP...but none really matched.

*I was quite sure about coffee bags being made of fused plastic and aluminum, but did a quick search to double check. I came across some neat ideas for old coffee bags: Other uses for coffee bags.

Sunday, April 8, 2012

04/07/2012 - Chickadees

Easter chickadees! I made these little cuties for Easter baskets.

Reclaimed Material: scrap fabrics
Other Material: none
Tools: scissors, sewing machine, fabric marker, thread, needle 

How I did it: I put two right sides of the scraps and eyeballed the shape of a chickadee and cut it out. I repeated this three more times, making each subsequent one smaller. The scraps I used for the bodies were fleece and cashmere. I used satiny fabric and cut out the wings and beaks for each side of each bird. Using a zigzag stitch I top stitched the wings on the right side of each body. For the larger two chickadees I stitched on beaks because the little ones had black lines where the beaks were which worked nicely for me. I put the right sides together then stitched them all around, but left an opening at the bottoms to stuff them. I turned them right sides out and stuffed with other fabric scraps. With a needle and thread I whip stitched the bottoms closed. With the fabric marker I made little dots for the eyes.

What I would do differently: Although I don't enjoy using patterns I probably should have used a simple pattern. One of the smaller ones looks a bit deformed. Why is it the smaller the something is the cuter it is?

Thursday, February 9, 2012

02/06/2012 - Cashmere Wrist Warmers

My mother-in-law is a fabulous crafter and let me go through some of her scraps for something I wanted to make for my niece for Christmas. Christmas came and went and I never got around to making these wrist warmers for my niece so I took the opportunity to make them as part of my New Year's challenge. They are really cozy though so maybe I will have to keep these for myself, tee hee hee.

Reclaimed Material: cashmere sweater scraps
Other/New Material: embroidery thread
Tools: scissors, needle

How I did it: I cut the scraps so the finished edges that were left would be the tops of the warmers and the top of the warmers each had a star on it. I made a simple pattern that measured about 5"x7" (there is a rudimentary pattern below if anyone wants to try this easy project). There were 4 pieces (2 for the left and 2 for the right. I put the wrong sides together and used the embroidery thread to sew the pieces together using a blanket stitch. After the pieces were sewn together, I sewed an "X" one inch inside the top right side of the left warmer and one inch inside the top left side of the right warmer.

What I would do differently: This project would have been much faster if I machine stitched them, but a) sitting and hand sewing is relaxing to me and b) I only finished one warmer on the 6th and finally finished the second one on the 8th. I will try this again with tops that fold over to make them mittens.

Sunday, January 22, 2012

01/21/2012 - Aluminum Wrist Cufflet

I don't know if the proper term for this is "cuff" or "cufflet" so I will go with cufflet because it sounds fancier. The black fabric is sexy fabric I found at SCRAP, one of my favorite places in Portland. They take donations of scrap material from businesses and individuals and resell it to fund their school and community programs. The place is an artist's/teacher's/crafter's/garbage picker's (me) dream come true. I am going next week to start my volunteer training, hooray!

Recycled Material: aluminum can, SCRAP fabric, old ribbon
Other Material: decorative brads
Tools: scissors, ruler, X-acto knife, Crop-A-Dile, double-sided tape, rubber electrical tape

How I did it: I cut the top and bottom off the aluminum can then cut a vertical line to open the can body. There is usually a line down the side of the can by the nutritional information and the print overlaps that I use as a guide to cut a straight line. I cut the can body so it was about 3.25" in height and left the length of the can, about 8" to fit my wrist. I marked the aluminum horizontally down the center .5" apart for placement of the brads, used the X-acto to poke little horizontal notches on the marks, and inserted the brads. I used the electrical tape to hold the brads in place on the back of the aluminum. I folded the top and bottom of the aluminum down towards the front a little less than .5", but did not press the aluminum all the way down until the fabric was attached. I cut the fabric 2 inches larger than the aluminum to have room for the edging. I lined the double-sided tape under the aluminum fold, taking care to make sure none would be sticking out from under the fold. I tucked one edge of the fabric under the fold so the back of the fabric stuck to the tape then wrapped the fabric over the back of the aluminum. I applied the double-stick tape to the bottom fold and then trimmed down the fabric a bit to make sure the fabric would be flush with the fold when I tucked it under the aluminum. I pressed the folds flat with my hands, but pliers can be used, which helped hold the fabric in place and to make sure it adhered to the tape.

The short ends of the cuff were too thick to fold so I used the rubber electrical tape to cover the edges. I used the Crop-A-Dile to punch 3 holes and set 3 eyelets on each end of the bracelet. The final thing I did was to lace the bracelet like a corset (or shoe, but corset sounds saucier) and tie it off. 

What I would do differently: My original plan was to try to stitch the fabric to the aluminum, but I got sidetracked watching Wall•E with my family and ended up making it by hand. I still need to experiment sewing on aluminum, so that will have to happen with another project. There seem to be many things I would have done differently with this project. I don't think it was necessary to do the fold down, other than it give the fabric and tape a stronger hold. I need to use a better eyelet next time, but I used up the ones I had left. The ribbon does seem like overkill for this bracelet, so I will most likely change it out regardless. I chose the blue fabric scrap to pull out little accents of clue from the fabric, but the piece I ended up cutting didn't have blue on it.

Thursday, January 19, 2012

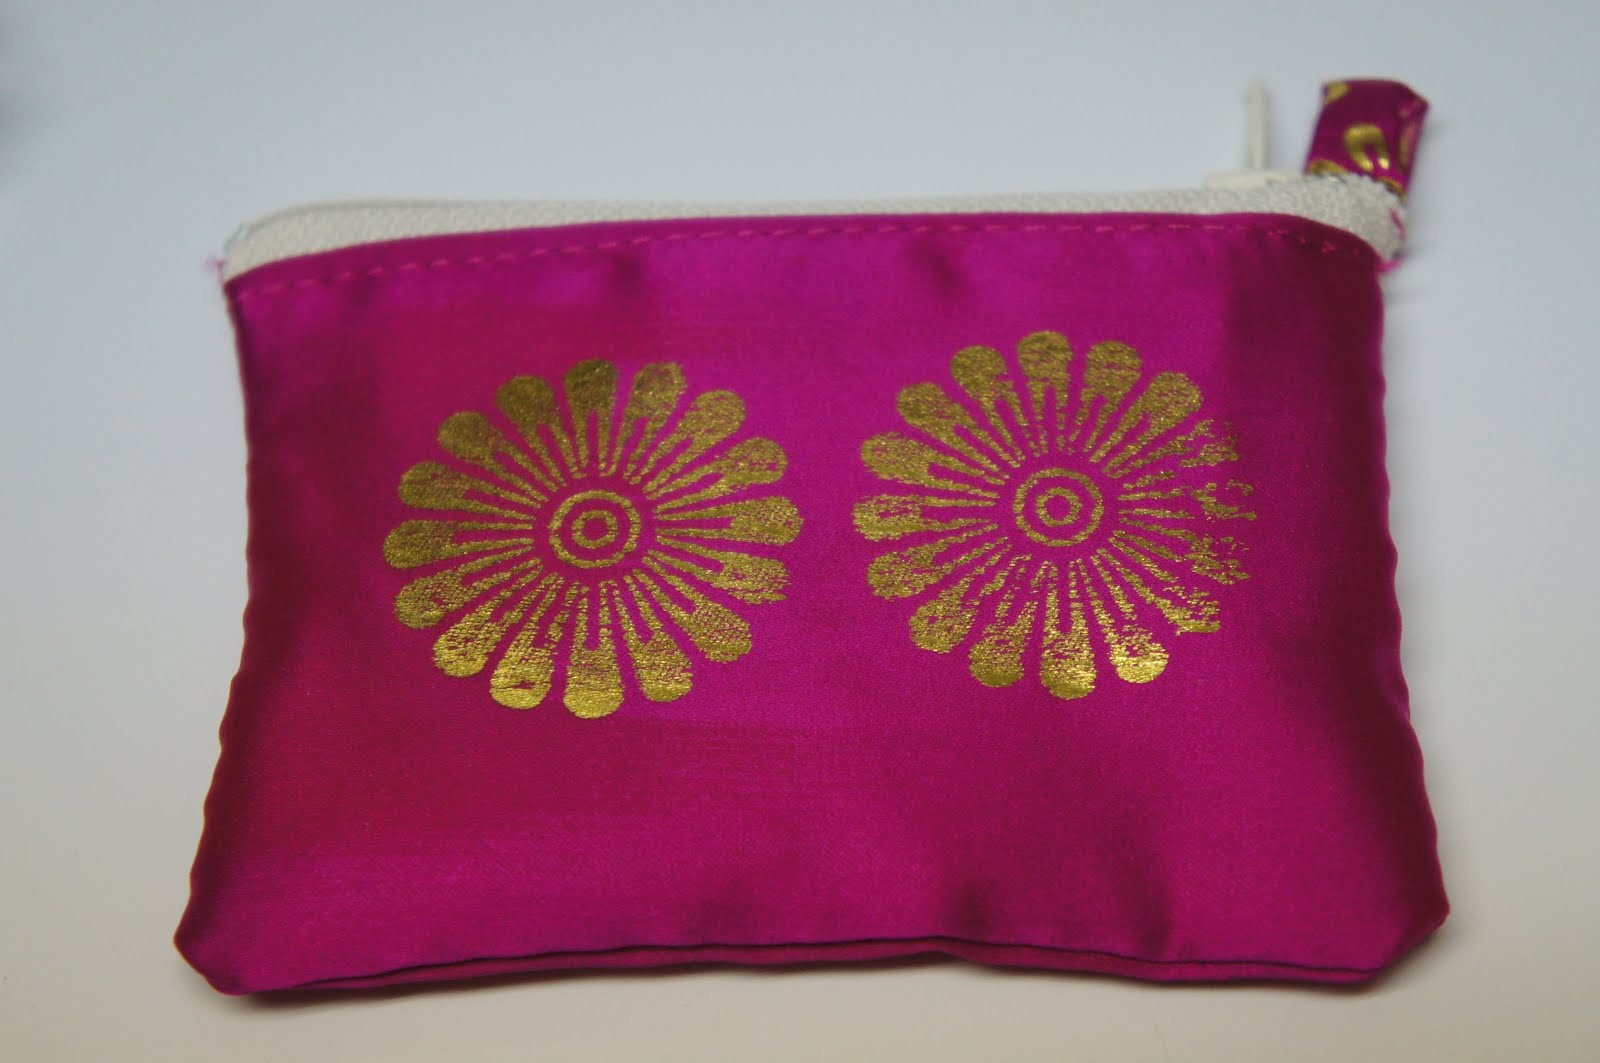
01/15/2012 - Hanbok Coin Purse


You are most likely thinking "what is a hanbok?" A hanbok is a traditional Korean dress usually made from silky material. My mother gave me about five of these dresses that were torn or stained and could no longer be worn or repaired. Super awesome score because there are some gorgeous patterns.

Recycled Material: hanbok dress fabric
Other Material: 4" zipper, matching thread 
Tools: sewing machine, scissors, tape measure

How I did it: I measured and cut 2 pieces of the fabric to the size of 4"x5" and a strip 1"x2.5" for the little handle. Because of the small size, I think it is easier to sew in the zipper first so you can lay the fabric flat. I folded the top of the right side of the fabric over .5" on both pieces of the body of the purse (trying to remember my sewing terms, but I believe the side you want to see is called the right side and the back is called the wrong side) then pinned the zipper. I used the sewing machine with a zipper foot to stitch both sides to the zipper. Next I folded the the piece over with the right sides facing each other and the zipper at the fold to sew the main part of the purse. I went back to a regular presser foot and stitched the three remaining edges, leaving a .5" edge. I added a zig zag stitch around these edges then trimmed them down. I then took the 1"x2.5" strip and folded it in half lengthwise with the wrong side facing out and did a simple straight stitch leaving a little less than .5" edge. I turned the strip inside out and folded it in half to make the little handle. The handle was stitched on the zipper pull side (the side the pull is on when it is closed). I made sure that I stitched over the zipper stitch that was already there then trimmed off the excess. The last thing I did was turn the purse inside out and had an elegant little coin purse.

What I would do differently: This is a simple pattern that can be made from about any fabric. I will probably make the handle width a little thicker so it will be easier to turn inside out. I think I have an old key ring somewhere I can attach to the little handle too.