Showing posts with label accessory. Show all posts

Sunday, October 21, 2012

07/01-07/18/2012

07/01/2012 -Rubber Band Headband
July 1st was a busy day for me. I worked all day then rushed home to get ready for my hubby to take me out for my wonderful birthday dinner. I didn't think I would want to work on anything after my hot date, so I did this project in the car ride to the restaurant. I cut 1/4" segments along the width of the tube. (If you are in a pinch and need rubber bands and have an inner tube, just cut the size you want by cutting through the width of the tube.) Then started pulling one band through the other to connect them together. I don't know how to describe the process, but when I got to the end I had to use a long strip to tie the ends together.


07/02-06/2012 - Really Big Inner Tube Basket
This is an offshoot from my 12 basket project for my sister-in-law. I love this giant size (2'x3') but the frame was too weak to support the rubber. This will be revisited with a stronger frame. Well, revisited four times since four baskets are needed.


07/07/2012 - Zoe's Lacey Skirt
This is another adult sized skirt that was stuck in with fabric at a fabric pricing party at SCRAP a few months prior. Zoe, of course, looks adorable wearing it. It reminds me of a girly steampunk skirt and I want to make a matching fitted vest and little top hat to go with it.


07/08/2012 - Practice Rubber Wrist Cuff
Wrist cuffs seem to be my "go to" craft. I think it was the first of my daily crafts. I made a practice cuff to lead a craft for Destination DIY's "Makin' It" Event on July 18th.


07/09-12/2012 - Camping Roll Slings
We have those wonderful self-inflating bed roll mattress thingies. The problem is containing them when not in use. I created a yoga mat-type sling to carry them and keep them together, out of, yes, you guessed it, rubber inner tubes. There are some kinks to be worked out, but I was happy with how they turned out. I got them done in time for out family camping trip.


07/13/2012 -Beer Can Lantern
Considering I freehand cut this lantern with a camping knife it didn't turn out too shabby. The ribbon I hung it from didn't seem like a good idea to combine with a citronella candle though.


07/14/2012 - Glow Bottle
I had read on Pinterest comment that you could make a glow bottle by opening a glow stick and pouring it in a water bottle filled with water. WRONG! I emptied about 6 glow sticks into a half filled water bottle before I finally gave up. All I could think of was those funny "nailed it" memes when people try to copy things from Pinterest. No photo of the lameness, but my sister-in-law did a hilarious thing where she taped glow sticks to herself to look like a stick figure lady. When it got really dark we walked around the campground cracking people up.


07/15/2012 - Rubber Wrist Cuffs
I was pretty pooped after getting home from our trip and made a simple rubber cuff to use as a sample for the Makin' It DIY event.
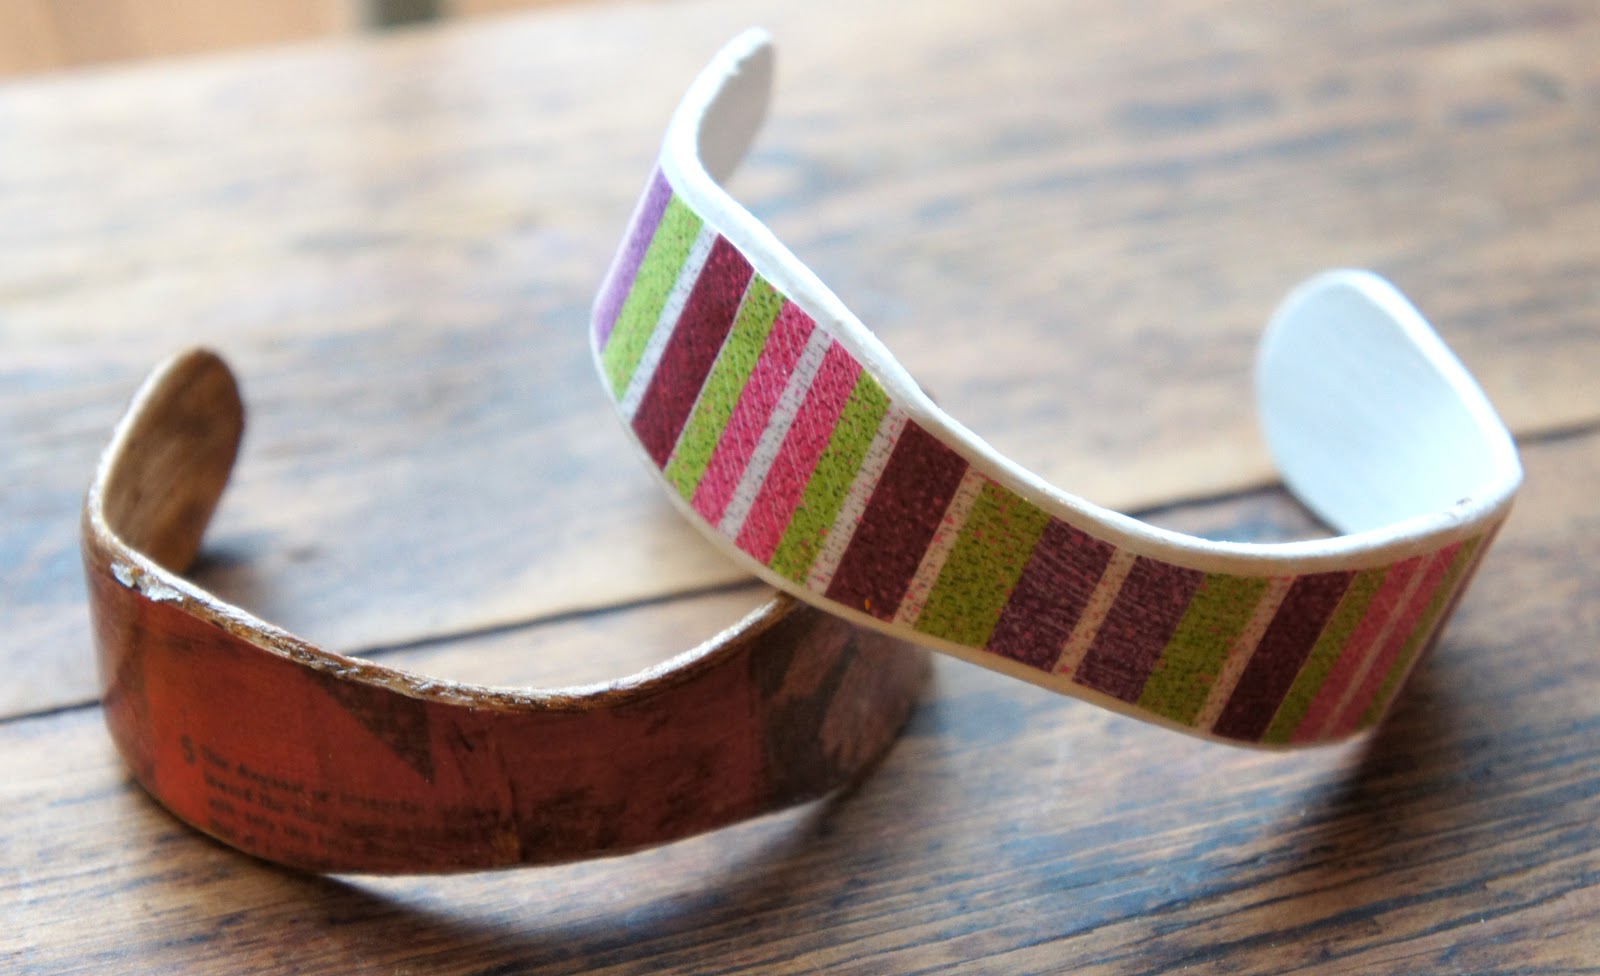


07/16/2012 - Wooden Bracelets
Another Pinterest attempt. I like how these turned out for the most part, but the white one didn't keep it's shape so it is too big to wear. I started the soaking process before the camping trip. Here are the instructions to give it a try: Wooden Bracelets.


07/17-18/2012 - More Wrist Cuffs 

I made a couple more examples of cuffs and led a quick tutorial at the Makin' It DIY event on the 18th. I didn't realize until a couple weeks later and had it pointed out by someone that this is not the peace symbol I intended. It was a big "duh" moment that I was showcasing an upcycled rubber cuff promoting the Mercedes Benz logo.

Tuesday, April 17, 2012

04/12/2012 - Starbucks Pin

This was part of an experiment for a college classmate who was looking for a Starbucks themed gift for someone. I haven't done a resin bottle cap in a while so I created this diorama-like pin.

Reclaimed Material: bottle cap, coffee sleeve, aluminum logo, lapel pin
Other Material: modeling clay, resin, clear nail polish
Tools: scissors, safety pin, jewelry pliers, glue, green paint pen

How I did it: The first step I did was to cut out the coffee sleeve to fit inside the bottle cap and cut the logo from an aluminum can. I glued the cardboard circle, corrugated side up inside the bottle cap, then glued the logo in place. I used the paint pen to paint over the outside of the bottle cap. While the paint dried, I modeled the coffee cup to fit (shhh...don't tell Zoe I used some of her modeling clay for this project) and glued it inside the cap. The tip of the paint pen was to fat, so I used the safety pin as a paint brush of sorts to paint on a semblance of the S-bucks logo. I didn't actually set the resin until the next day since it was too late to go to the store when I decided to do this. I mixed a small amount of resin in an old container and poured it into the bottle cap and let it set. After the resin set, I painted over it with a couple coats of clear nail polish. I glued the old lapel pin to the back of the bottle cap using an epoxy glue to make sure the metals would stick together.

What I would do differently: I poured the resin outside near the end of a beautifully sunny day and didn't pay attention to the quick shower that blew in...I should have known better since I have lived in Oregon close to a year now. A drop of  rain got in the resin before it was fully set, so that little bit didn't set right, which why I ended up covering it with a few coats of nail polish. This would be fun to make little scenes in the bottle caps.

Friday, March 16, 2012

02/20/2012 - Rubber/Antique Button Hairband

Yes, another headband...for a friend. I got this done the night before I went out of town so I just took a quick picture.

Reclaimed Material: rubber inner tube, antique(ish) button
Other/New Material: none
Tools: scissors, needle, thread, tape, paper

How I did it: Again, I did the same thing as the other headbands. My grandmother-in-law gave me some of her old sewing stuff and I found the awesome button for the middle of the flower.


What I would do differently: As you can see the flower rolls up on the sides. I found with some of the inner tubes that they roll up depending on how I cut them.

Sunday, February 12, 2012

02/10/2012 - A Different Rubber Headband

This headband is for a friend's daughter, so I hope she likes pink! It is pretty much like the rubber headband I did a few days before with a few changes. 

Reclaimed Material: rubber inner tube, buttons
Other/New Material: decorative eyelet
Tools: scissors, needle, thread, tape, paper, Crop-A-Dile

How I did it: I followed the same steps I did for the headband I made from February 3, but made the center flower a little smaller and added a flower on either side of the larger one. Instead of using a button, I used a decorative eyelet I bought a long time ago. I thought it would be perfect to try and I am happy that it fit to hold the rubber pieces together. I used the Crop-A-Dile to attach the eyelet in the middle flower then found coordinating buttons for the smaller flowers.

What I would do differently: I ended up braiding the band again because it does stretch out and hold nicely. I think I am going to make some of these for my Etsy shop because I now have other design ideas floating around in my head.

Thursday, February 9, 2012

02/06/2012 - Cashmere Wrist Warmers

My mother-in-law is a fabulous crafter and let me go through some of her scraps for something I wanted to make for my niece for Christmas. Christmas came and went and I never got around to making these wrist warmers for my niece so I took the opportunity to make them as part of my New Year's challenge. They are really cozy though so maybe I will have to keep these for myself, tee hee hee.

Reclaimed Material: cashmere sweater scraps
Other/New Material: embroidery thread
Tools: scissors, needle

How I did it: I cut the scraps so the finished edges that were left would be the tops of the warmers and the top of the warmers each had a star on it. I made a simple pattern that measured about 5"x7" (there is a rudimentary pattern below if anyone wants to try this easy project). There were 4 pieces (2 for the left and 2 for the right. I put the wrong sides together and used the embroidery thread to sew the pieces together using a blanket stitch. After the pieces were sewn together, I sewed an "X" one inch inside the top right side of the left warmer and one inch inside the top left side of the right warmer.

What I would do differently: This project would have been much faster if I machine stitched them, but a) sitting and hand sewing is relaxing to me and b) I only finished one warmer on the 6th and finally finished the second one on the 8th. I will try this again with tops that fold over to make them mittens.

Monday, February 6, 2012

02/04/2012 - Pull Tab Cuff

I was determined to make this bracelet work. I wouldn't call this exactly a successful project, but it is the general idea of what I wanted to accomplish. From what I understand, aluminum cannot be soldered and I believe welding a small aluminum tab would just melt it, so I am on a quest to find a way to hold these pieces together and super glue was just my temporary solution.

Reclaimed Material: aluminum pull tab
Other/New Material: none 
Tools: super glue, (2) pliers, patience

How I did it: I took 8 pull tabs from cat food cans and made sure they were clean and bend down the jagged part on the bottom hole. I began by overlapping two tabs with the bottom overlapping, using super glue in between the tabs, then overlapping the top over a new tab, super gluing, etc. After the super glue set, I put the strip of tabs over my wrist to determine where to bend it to fit. I clamped a pair of pliers on one side of the hole where I wanted to bend the piece and the second pair of pliers on the other side of the hole and slowly bent the aluminum and continued this in the sections needed to fit my wrist. To be quite honest, I was very impatient with this and did not give the super glue enough to fully set and the tabs popped away from each other when I first started bending them by hand.
 
What I would do differently: I am determined to find a solution to melting this tabs together other than using caustic glue which really is not a great solution because it can break apart. Using the pliers scuffed up the aluminum, which could be good if I want a weathered look.

02/03/2012 - Rubber Headband

I get headaches from regular headbands and fabric headbands always slide off my head, so I have never had a good headband option...until now. The rubber makes a great headband because it stays in place and has enough elasticity to stay in place without squeezing my head or slipping off.


Reclaimed Material: rubber inner tube, button
Other/New Material: none 
Tools: scissors, needle, thread, tape, paper

How I did it: I used three strips of inner tube a little bit wider than 1/4" and 25" long each. I wrapped a small piece of tape around the three pieces on one end then did a regular braid and taped off the end. I fit the band to my head and stitched the ends that were overlapping. I wrapped an extra strip of rubber around the overlapping ends to cover them and did a small stitch to hold the cover in place. For the flower, I cut out my pattern on the paper then cut out two flowers using a wide piece of inner tube. Both flowers were sewn onto the headband then I found a coordinating button from my random box of buttons that everyone seems to have and sewed it on top of the flowers.

What I would do differently: Braiding the band looked nice, but the rubber strips kept twisting and the band curls up. I think doing a round braid or just using wider strips would work just as well.