Wednesday, October 31, 2012

August 2012!


08/01-2/2012 - Woven Coin Purse
My intention was to make this a little bigger to fit cards, but I cut it a little too small. It is a really cute little coin purse which I have been meaning to make for myself anyway. I used a loom to weave this so the process did go much faster than the one I had made earlier in the year. 


08/03-4/2012 - Rubber Choker Necklace 
I know these really aren't in style, but I still think chokers are sexy. I was going to add a charm to it, but it didn't really flow. I love this red Asian-inspired fabric that I found at SCRAP to accent it though.


08/05-06/2012 - Rubber Tree
This project was much harder than I thought. I tried three different types of glue to make this work. Tires are much harder to work with than the inner tubes because they lack flexibility and are harder glue to each other. I prefer not to use anything too caustic, but I found some rubber adhesive at the hardware store. My goal is to make a giant tree in the future. I think it would need some sort of armature that I could staple or nail the rubber to.


08/07-08/2012 - Experimenting with making more Yoga Slings
My experiments looked like a crazy mess, so I am not bothering to add a picture. I was trying to create different closures than Velcro like I did for the camping bed rolls. I think if I add a little more patience and head back to the drawing board, this could work.


08/09/2012 - Wallet Cuff
I feel purty darn smart for coming up with this. I made an opening in the lining of the cuff to secretly keep cash. The one issue I ran into was the shape of the inner tube that I used. It bowed out in the center a little bit, but I am excited about the concept.


08/10/2012 - BJ Purse Handle 
This purse was actually Grandma BJ's Christmas present, but the handle was a little too short (I actually cut it down because I was afraid it was too long when I made it). She would still carry it around and show it off though -- I think I should have her be my publicist.


08/11/2012 - Brake Wire Tree
I made this tree by twisting apart the brake wire, then twisting it back to look like a trunk and branches. Of course, my fingers were worse for the wear when I was done. I cut little leave and poked each one through a little strand of brake wire. I really love this, but it still needs some work. Someone at work donated a tree made of brass that looked kind of like mine, so someone else also had my great idea.


08/12/2012 - Speaker Box
My sister-in-law and nephew, Heather and Hunter, came over again and we worked on the speaker box project we started in May. We decided to use a jigsaw to cut out the fronts of the boxes. I need to add shelves to mine and add more coats of paint, then I plan to use it as a bathroom shelf. Heather finished hers and made it look artsy and Asian-inspired.

We also entertained the kids, ourselves and great grandma by turning an old swimming pool liner into a slip and slide!


08/13/2012 - School Supply Redux
After talking to my sister in Chicago, I decided it would be cheaper for me to buy my niece's school supplies at SCRAP and mail it to her, then for my sister to buy everything new. I got almost everything from the list that SCRAP had in stock, plus a few extras and only spent $4.88! I did a cost breakdown for SCRAP's blog: School Supplies for under $5!  A few of the items had to be fixed up, like this composition notebook. Thankfully my niece likes wolves and Sierra Club keeps sending me these same exact cards over and over again. Her supply list was very specific, so I improvised with the folders as well. She needed certain colors with pockets, so I added pockets, etc.


08/14/2012 - Map Star 
I enjoy doing paper crafts, but I don't think it is my strong suit. I saw instructions to make this star online, but it was in German, translated into confusing English. I struggled to follow the pictures, but I think I finally figured it out. I also used up a map I got in the mail.


08/15/2012 - Magic Braid Rubber Bracelet
I got excited when I saw the Pinterest Instructions to make this "magic braid" from leather. I figured it could also work with rubber and it did! Hip hop hooray! I must say, I am proud of myself for not just pinning stuff to try, but actually doing it!


08/16-17/2012 - Wire/Rubber Basket 1
The biggest challenge in making my baskets is making a sturdy frame. I bought a pair of sturdy metal frames from SCRAP to turn into baskets. With the wood frames, I have the benefit of stapling the rubber to the wood, but that obviously doesn't work with metal. Because the rubber is so stretchy, I was able to tuck the ends under to hold them in place. They were surprisingly sturdy.


08/18/2012 - Zoe Storage Book
Kids are so rough on books when left unattended. Zoe got this fun pop up book from one of her grandma's, but after a couple years, it was worse for the wear. I took off the cover and glued a zipper around the edges and also glued in a lining for Zoe to keep stuff in. I drilled a couple holes in the spine and pulled ribbon through for the handle. I tried using a plastic handle I had, but the spine was too thick. It is a great storage place for her stickers.


08/19/2012 - JG Bracelet
I am such a nice sister...making all this stuff for my sis, but still haven't sent it to her. Sorry, Jules, guess what will be in your Christmas package? :) I cut thin rubber strands and threaded them through some sparkly letters I got at SCRAP. I used wire to wrap the ends and make a closure.


08/20-21/2012 - Wire/Rubber Basket 2
I made the twin to the basket I made a few days earlier. That's all I got.


08/22/2012 - Doll Arm Jewelry Hangers
These are one of my favorite things I have made. I bought some random doll arms at SCRAP and found some wood samples and attached them to make little jewelry hangers. I am still trying to figure out my fascination with doll parts. Kind of creepy and cool all wrapped together.


08/23/2012 - Cycling Dream Catcher 
UPDATE 4/4/17 - I have removed this photo and craft. At this time, I was oblivious to the fact that creating dream catcher crafts is not appropriate for a non-Indigenous person. Dream Catcher are an important part of what defines Native Americans.


08/24/2012 - Film Canister Salt and Pepper Shakers
I was so excited to use these for our camping trip. Really, how brilliant, film canisters that were the corresponding colors. Not so great when I went to season food while outdoor cooking though. I didn't drill the holes big enough so I just popped the lids of and sprinkled salt and pepper on the food. I am still giving myself kudos for this one though.


08/25/2012 - Zoe Number Tin
We were preparing to take our 3 year old on a 4 hour car ride to camping, so I thought it would be fun to make her a little magnetic number game. First things first -- decorate a cute tin to put it in! I used an old calendar picture and Mod podged it onto the top of an Altoids tin.


08/26/2012 - Game Piece Magnets
I took some old rounded game pieces and glued magnet circles I had cut to the backs for the number tin. At first I tried to paint letters and numbers onto the pieces, but the plasticy blue color made them hard to see. I painted each piece silver then added numbers to them. As you can see there a few numbers missing and a few went AWOL somewhere in the car. It did manage to keep Zoe entertained for quite a while.


08/27/2012 - Crocheted Rubber Circle
I can knit and crochets straight lines for days (but that is about it) and have been wanting to try crocheting rubber into circles. I practiced for many hours on the car ride to our camping trip using regular yarn before I started with rubber. It took me quite a few hours to get this much done, so I need to keep practicing with yarn.


08/28/2012 - SCRAP Kite
Since we were camping on the Oregon Coast, I thought it would great fun to get Zoe a kite. I bought one from SCRAP and Zoe and I decorated it to fly at the beach. The kite achieved about 3.2 seconds of air time before the harsh coastal winds beat it out of the sky. Lesson learned - little plastic kites are no match for the Pacific Coast.


08/29/2012 - Crocheted Bracelet
I was feeling pooped and defeated from my lack of success with the kits and rubber circle, so I made myself a crocheted rubber bracelet on the car ride home. I also made Jason stop on the side of the highway so I could grab some blown tires for my OMSI project (but didn't end up using). I should join a roadside clean-up crew though, there is some interesting stuff out there! 


08/30/2012 - Chain and Bead Bracelet
Breaking chains is surprisingly difficult. Jason got me a heavy duty bike chain breaker, but it is still slow and tedious and leaves my hands filthy. I just love the shapes of the pieces though and enjoy incorporating them into things. I have been thinking about making a bracelet like this for a few years now, I have finally done it! Hoorah!


08/31/2012 - Rubber Chain Strand Bracelet
This has become one of my favorite bracelets to wear. I cut really thin strips of rubber and spaced out the chain links on it. I used aluminum wire to wrap the ends and added a clasp. I think I need to upgrade the wire I am using though.

Tuesday, October 30, 2012

07/21-31/2012

07/21/2012 - Rubber Triangle Necklace
I saw a picture of this on Pinterest and fell in love with it. It looked like it was just a picture of someone's art, so I hope they don't mind me copying their beautiful design. Every once in a while I get rubber tubes with a colorful line on it, so I incorporated it into this necklace.


07/22-23/2012 - Round Rubber Basket
The picture is kind of deceiving for this basket. I didn't plan the bottom very well and there in a stack of rubber strips about an inch thick so it doesn't sit completely flat. Other than that, I love how it turned out. I made the frame using embroidery hoops that were missing the outer parts and the wire handles from take-out containers for the vertical frames. I do love when I can make my projects from 100% reclaimed materials though!


07/24/2012 - Studded Wrist Cuff
When I first started making things with rubber, I would use scrapbooking brads for embellishments because of the variety of shapes and colors. The problem is (like most things we buy these days) they are so chintzy. I need to find an alternative that doesn't cost much more but has options. Now that I have said that, I used cute little square brads to adorn this cuff.


07/25-26/2012 - Free Form Bracelet 
This really shouldn't have taken me three days to complete this, but I kept adding parts and trying to figure out a good option for the closure. I has seen clamp/crimp closures once upon a time, but just couldn't any at work or at the big box crafty stores. I ended up using a magnetic clasp (for purses) and kind of ruined the whole thing. I may take it apart and redo it sometime. Maybe after my year of creating is over. 


07/27/2012 - Plastic Bowl
My collection of mesh fruit and food bags has grown over the years, but I only used one or two for scrapbooking. I thought it would be interesting to see what happened if I melted them. I turned a metal bowl upside down and layered about 6 layers of the mesh bags over the bowl and covered it with foil. (I wasn't sure what would happen so I put a cookie sheet underneath. The bags shrunk quite a bit so it is a half bowl, but it looks really neat. It is more of an artistic bowl, I suppose.


07/28/2012 - Starbucks Earrings
I made these earlier in the year from Starbucks "splash sticks", or as Zoe calls them, "the mermaid". The design is a little bit different. My sister asked for a pair when I first made them, so I finally got around to it, but now I still need to send it to her.


07/29/2012 - "Olympic" Medal
In the spirit of the Olympics, I took plastic rings in the colors of the Olympic rings and hot glued them to a gold baby formula lid. I had to cut the rings to connect them but those little bugger plastic rings were a pain to hot glue back together. I awarded my sweet husband with his own medal. This would be a fun project for little ones during the Olympics.


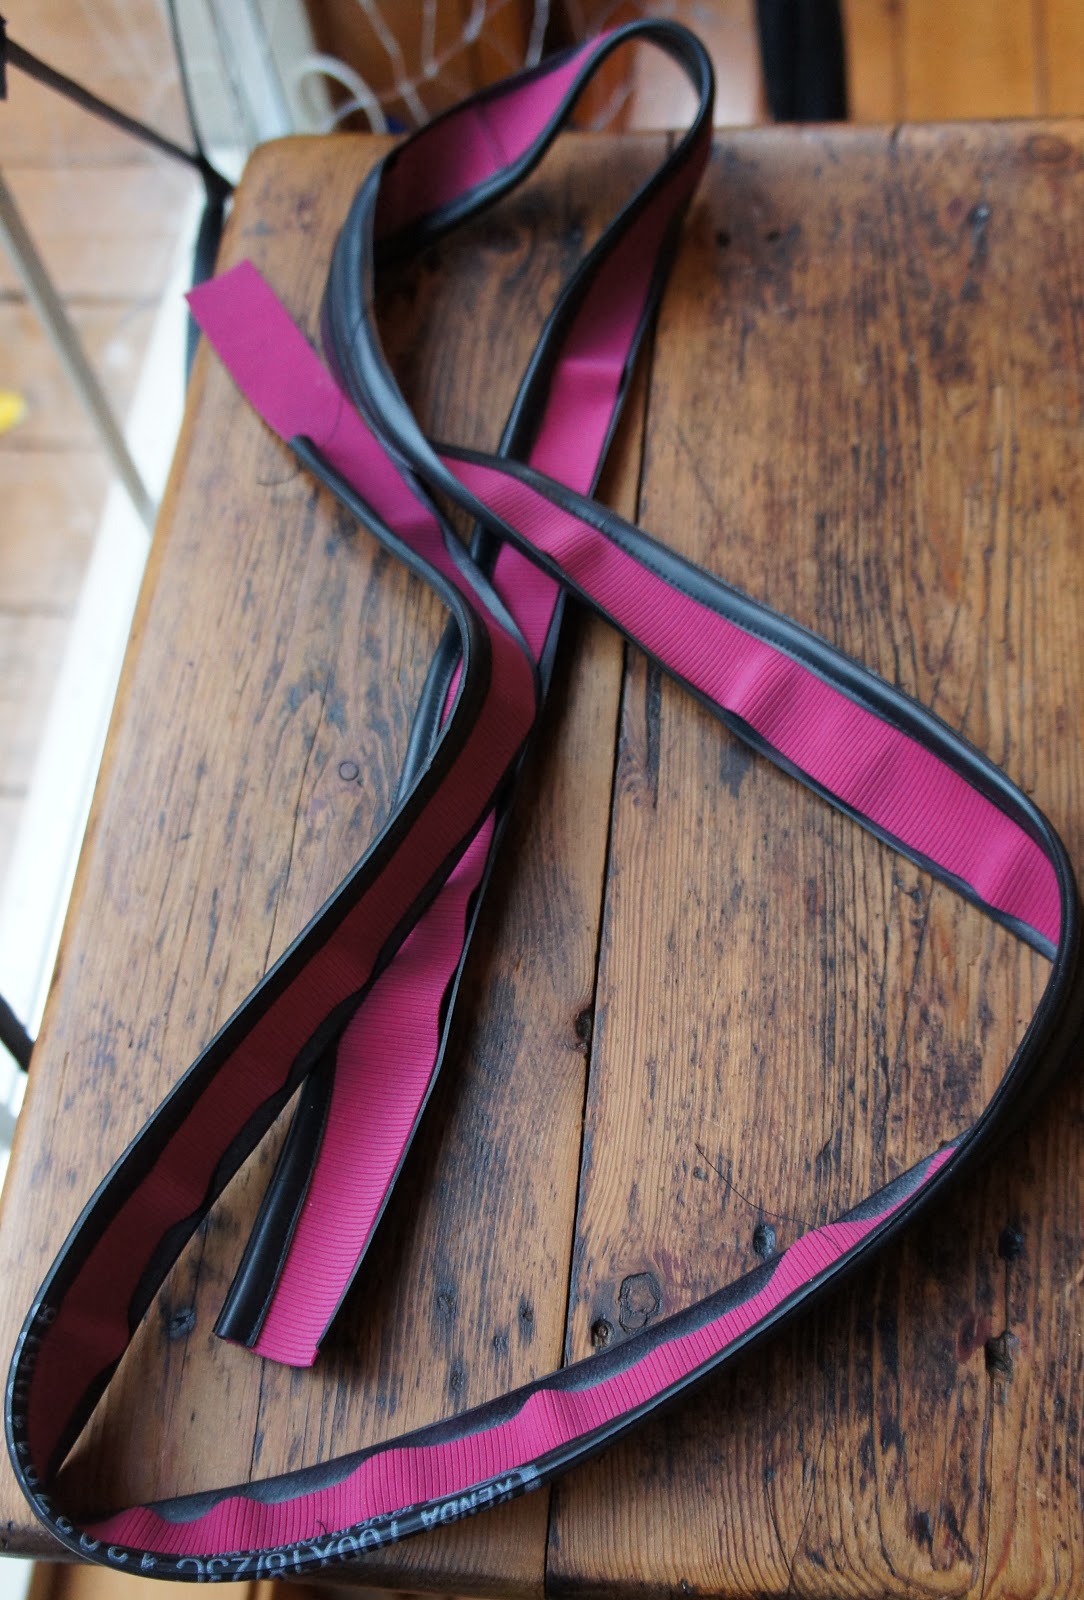
07/30/2012 - Pink/Rubber Yoga Mat Strap
I found some great bright pink fabric at work that I thought I could use for a yoga mat strap, but (probably through poor execution) it just didn't work out quite right, so this turned into a half finished project. I didn't want it to go to waste, so I used it for my project for the next day. Just another case of trial and error.


07/31/2012 - Rubber “Bangle" Bracelet
The pink fabric didn't work out as the yoga mat strap, so I turned it into a "bangle" type bracelet.

Sunday, October 21, 2012

7/20/12 - Angry Birds Name Diorama

This project probably just shows that I have played Angry Birds one too many times. I made this for my husband's niece's birthday. The kid in me wished that my name was "Iris" so I could have kept it for myself, tee hee.

Reclaimed Material: wood scraps, plastic mailer, plastic toy packaging, Chinese food take-out handle, old cigar box
Other Material: clay, wire
Tools: hot glue gun, paint and brushes, marker, sand paper, scissors 

Random thoughts about this project: I haven't done a diorama since I was a kid, but they were some of my favorite school projects. It took me a while to figure out how to do the rocks. I started wrapping paper balls around the "s" shaped take out handle. I ended up wadding up bits of a plastic bag and hot gluing the "rocks" to the handle. A few fingerprints were lost in the process though.


07/19/12 - Wooden Bible

I bought a piece of a wood flooring sample with a rubber strip on it from SCRAP because it reminded me of a book. After a few months, I had an "aha" moment and decided to turn it into a decorative "Bible" for my mom. Since the rubber strip could be removed, I decided after I painted it to turn it into a small keepsake box.

Reclaimed Material: Wood Flooring Sample
Other Material: none 
Tools: gold paint pen, drill, chisel


Random thoughts about this project: Painting this to look like a Bible was the easy part. Trying to chisel out the middle for the box portion without ruining the piece was a challenge. I hollowed out a little bit then set it aside thinking I had plenty of time to finish it for my mom's birthday in September...and I managed to forget about it until right before her birthday.

07/01-07/18/2012

07/01/2012 -Rubber Band Headband
July 1st was a busy day for me. I worked all day then rushed home to get ready for my hubby to take me out for my wonderful birthday dinner. I didn't think I would want to work on anything after my hot date, so I did this project in the car ride to the restaurant. I cut 1/4" segments along the width of the tube. (If you are in a pinch and need rubber bands and have an inner tube, just cut the size you want by cutting through the width of the tube.) Then started pulling one band through the other to connect them together. I don't know how to describe the process, but when I got to the end I had to use a long strip to tie the ends together.


07/02-06/2012 - Really Big Inner Tube Basket
This is an offshoot from my 12 basket project for my sister-in-law. I love this giant size (2'x3') but the frame was too weak to support the rubber. This will be revisited with a stronger frame. Well, revisited four times since four baskets are needed.


07/07/2012 - Zoe's Lacey Skirt
This is another adult sized skirt that was stuck in with fabric at a fabric pricing party at SCRAP a few months prior. Zoe, of course, looks adorable wearing it. It reminds me of a girly steampunk skirt and I want to make a matching fitted vest and little top hat to go with it.


07/08/2012 - Practice Rubber Wrist Cuff
Wrist cuffs seem to be my "go to" craft. I think it was the first of my daily crafts. I made a practice cuff to lead a craft for Destination DIY's "Makin' It" Event on July 18th.


07/09-12/2012 - Camping Roll Slings
We have those wonderful self-inflating bed roll mattress thingies. The problem is containing them when not in use. I created a yoga mat-type sling to carry them and keep them together, out of, yes, you guessed it, rubber inner tubes. There are some kinks to be worked out, but I was happy with how they turned out. I got them done in time for out family camping trip.


07/13/2012 -Beer Can Lantern
Considering I freehand cut this lantern with a camping knife it didn't turn out too shabby. The ribbon I hung it from didn't seem like a good idea to combine with a citronella candle though.


07/14/2012 - Glow Bottle
I had read on Pinterest comment that you could make a glow bottle by opening a glow stick and pouring it in a water bottle filled with water. WRONG! I emptied about 6 glow sticks into a half filled water bottle before I finally gave up. All I could think of was those funny "nailed it" memes when people try to copy things from Pinterest. No photo of the lameness, but my sister-in-law did a hilarious thing where she taped glow sticks to herself to look like a stick figure lady. When it got really dark we walked around the campground cracking people up.


07/15/2012 - Rubber Wrist Cuffs
I was pretty pooped after getting home from our trip and made a simple rubber cuff to use as a sample for the Makin' It DIY event.


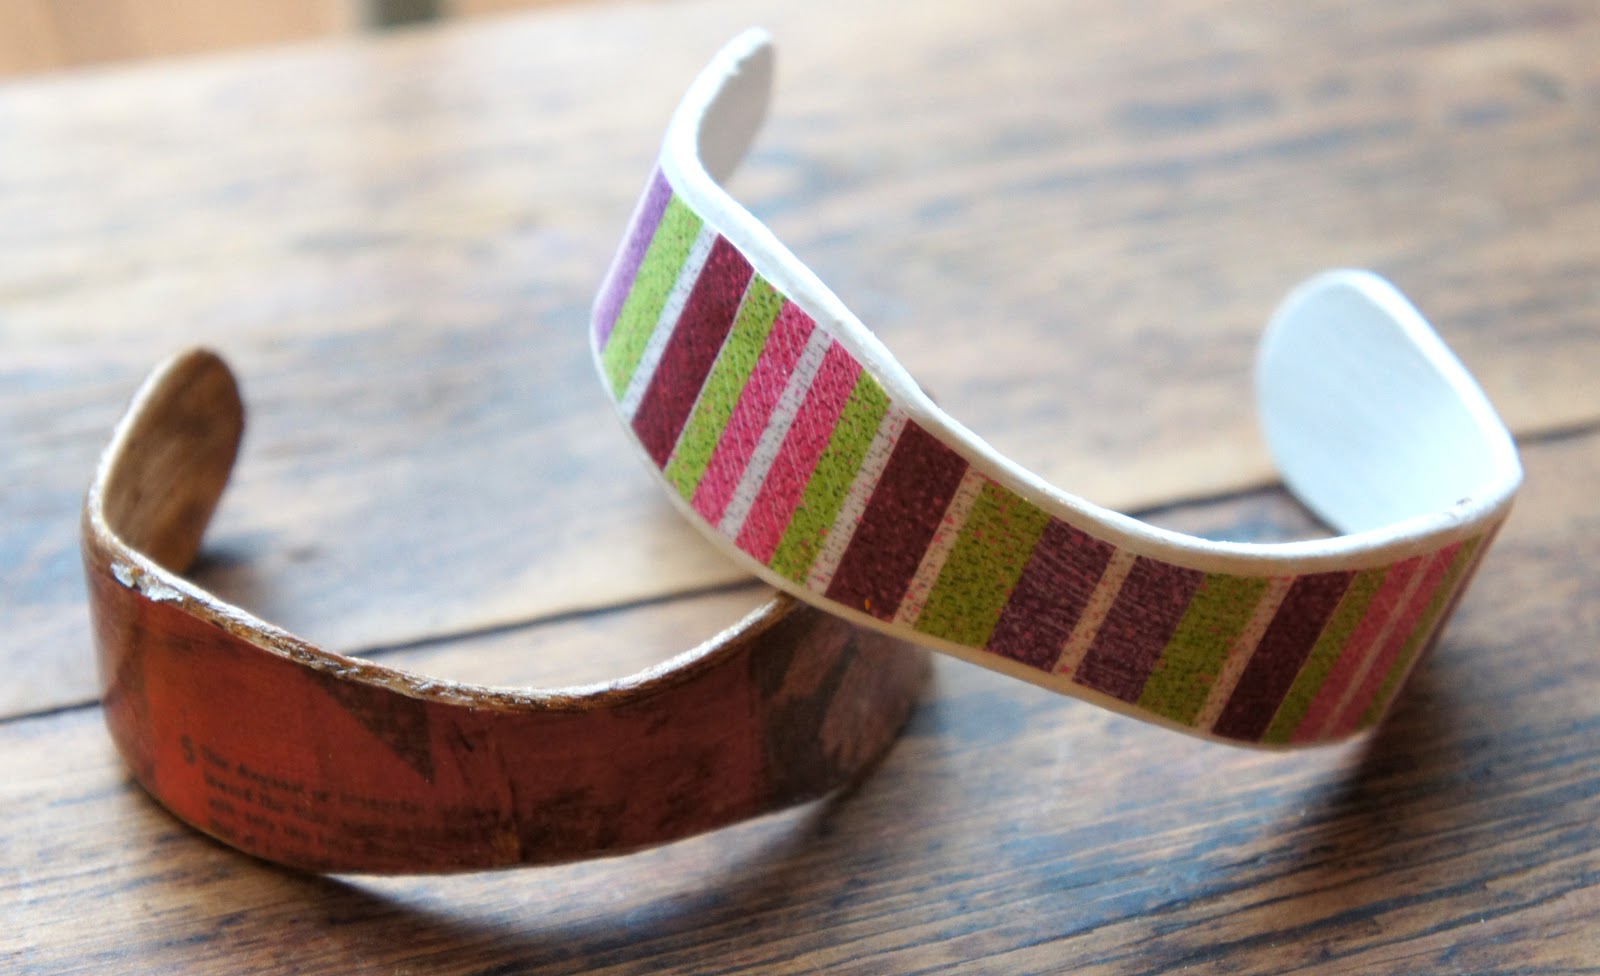
07/16/2012 - Wooden Bracelets
Another Pinterest attempt. I like how these turned out for the most part, but the white one didn't keep it's shape so it is too big to wear. I started the soaking process before the camping trip. Here are the instructions to give it a try: Wooden Bracelets.


07/17-18/2012 - More Wrist Cuffs 

I made a couple more examples of cuffs and led a quick tutorial at the Makin' It DIY event on the 18th. I didn't realize until a couple weeks later and had it pointed out by someone that this is not the peace symbol I intended. It was a big "duh" moment that I was showcasing an upcycled rubber cuff promoting the Mercedes Benz logo.

Monday, August 20, 2012

06/20 - 06/30/2012

06/20-21/2012 - "Sugar Snap Peas" Plant Marker 
Harvest time is coming and not all of my signs got done this year. We have had a great garden so far and my brown thumbs are starting to turn a lovely shade of chartreuse. Perhaps next year, when I have all my signs done, my thumbs will be green. One can dream. 

I was going to use a real picture of Mama Jan like I did with Jason's marker, but per her request, I did not. She still needs a face though.


06/22/2012 - “Mercury” Glass
Once again, "as seen on Pinterest". With my backwards way of doing things I didn't use the paint recommended and ran out of regular silver paint. I used a paint pen and kept pressing the tip inside the empty jar and rolling the sparse amount of paint that came out to cover the inside. Jason kept looking at me like I had lost my mind while I worked on this. When I finally got the bright idea to open the pen and just pour the silver paint in, I ran out of paint. It still looks neat. It would probably have turned out a little more fancier if I followed the instructions that I found, but I like to work with what I have.


http://pinterest.com/pin/132996995216212352/06/23/2012 – Washer/Rubber Bracelet 
I am determined to lose this bracelet and still don't have a picture. I really like it and was just wearing it yesterday. Of course, I substituted the string for rubber and used little round washers from a garage sale instead of using what the instructions specified. Another project off my Pinterest "to try" list though. Yip yip. This is not my picture, but this is pretty easy to make if you are feeling all washed up. tee hee.


06/24/2012 - Bow Tie Hair Band
This wasn't really a failure, but I got bored making it because it wasn't going to turn out as cute as I had hoped. This was another case of me trying to use bike materials (rubber and brake wire) to create this hair band.  


06/25/2012 - Game Board Bowls
This was an experiement I wanted to try for quite a while, but started with scraps from other game board projects. I soaked the boards in water until they were saturated then pressed them into bowls to dry. I didn't realize that the boards were two separate pieces held together by tape and some kind of glue that comes apart in water. I think this can work with a little tweaking and cleverness, so this may be seen again.


06/26/2012 - Instructables Hair band
My friend sent me info to enter an Instructables contest. I didn't win (there were some amazing entries) but I did end up with a one year subscription to Instructables (hooray!). Check it out if you want to make your own.


06/27/2012 - Red Flower Ring
Another fabulous bit of garbage saved for me. I really am not sure what this lovely red flower is from (I keep forgetting to ask), but I have another one to experiment with still. I used toy wire and random bead from SCRAP to make this little ring. 


06/28-29/2012 - "Onions" Plant Marker
You can't tell from this picture, but there is a sketch of onions in this picture. I really do plan to finish my plant markers before next season.


06/30/2012 - “To Go” Kit Vases 
More bits from the same "To Go" kit! I was a sucker and bought this cute little drawer from work with no intention in mind. The "vases" are marker lids I had to cut down to fit into the drawer. Both the lids and flowers were in the kit. I like this, but I might take out the flowers if I find a higher purpose for the drawer.

06/07-06/10, 06/12-06/13, 06/15-19/2012


06/07/2012 - Flip Flop Hanger
This project is born from my Pinterest addiction. I have been wanting to try this, but didn't have any wire hangers, so the crafting gods intervened and I found some in the recycling bin at work. I used some big ol' beads on the ends, but it is such an easy, clever idea. Here is the link if you want to try: shoe hangers.


06/08/2012 - Round Braid Headband
I am in love with the idea of creating a useful item with only one material, ie: no wire, glue, etc. I started the headband by making a round braid and tying a knot. I crisscrossed pieces of inner tube to cut out to make some sort of flower or shape. I didn't finish it because it felt so clunky. I will end up taking it apart and using it's pieces. I am learning a lot about trial and error on my crafting journey.


06/09/2012 - Tubing Weave Revisited
Yes, this is the same project from 5/22. I am still determined to make this tubing work into a basket!!!


06/10/2012 - Wonky Box/Ball thingie
I am kind of embarrassed to show this picture. I had a little too much wine prior to making this. I have been making purses for years using a tab method, so I thought I would try to come up with a ball doing the same thing. Ehhhh (that is supposed to be the sound of the Jeopardy! buzzer going off for this project).


06/12/2012 - Map Flowers 
The goal for these flowers is to turn them into a ball to represent a globe. I keep getting maps from the Sierra Club, which are cool, but I think sending two or three maps to same person every year is excessive. 

These do remind me of my church days and missionary studies though. I can't help but think these would make great centerpieces for a missionary conference or banquet.


06/13/2012 - “To Go” Kit Coin Pouch
In case you are wondering about these SCRAP "To Go" kits I have referred to before, I am going talk a little bit about their awesomeness. If I were a poet, I would write sonnets proclaiming the wonder of these jam-packed tennis ball cans. I won this "To Go" kit right before I started working at SCRAP. I have managed to get goodies out for myself before Zoe got to them. (The pictures on the left shows all of the great things a wonderful SCRAP volunteer stuffed into the can.)


I took out the fabric bits and ribbon included in the can and they just happened to be the right sizes and cuts to make a little coin pouch. I used the leftover sticks from the Hard Rock Cafe jewelry I made and threaded it through the ribbon to make the mouth of the pouch and sewed on a little snap. Viola! A truly scrappy creation.


06/15, 06/16, 06/17/2012 - Rubber Friendship Bracelet 
I haven't made one of these since I was in high school. I feel like just about every girl, maybe even some boys, tried to make these at least once. I used to tie off the embroidery thread on a safety pin, attach the pin to something and start tying off the bracelet. I had some random bits of inner tube and gave this a try. It had a cool effect of coiling, but I had to keep going. Yes, I did spend three days making this. 


06/18/2012 - Rubber Tubing Celtic Knot
Again with this rubber tubing! I saw instructions for making a celtic knot on Pinterest. It kind of worked, but the knot wasn't as tight as I would have liked it to be. I thought it might make a cool necklace, but, again, the tubing didn't want to cooperate with me.


06/19/2012 - Mayo Ring Bracelet
My wonderful mother-in-law has been awesome about saving me discarded materials like plastic rings, newspaper bags and other fun goodies. I took a ring that she painstakingly removed from a jar and wrapped it with ribbon from the "To Go" kit and think it turned out pretty cute, if I do say so myself. And, I do say so myself.


Tuesday, July 31, 2012

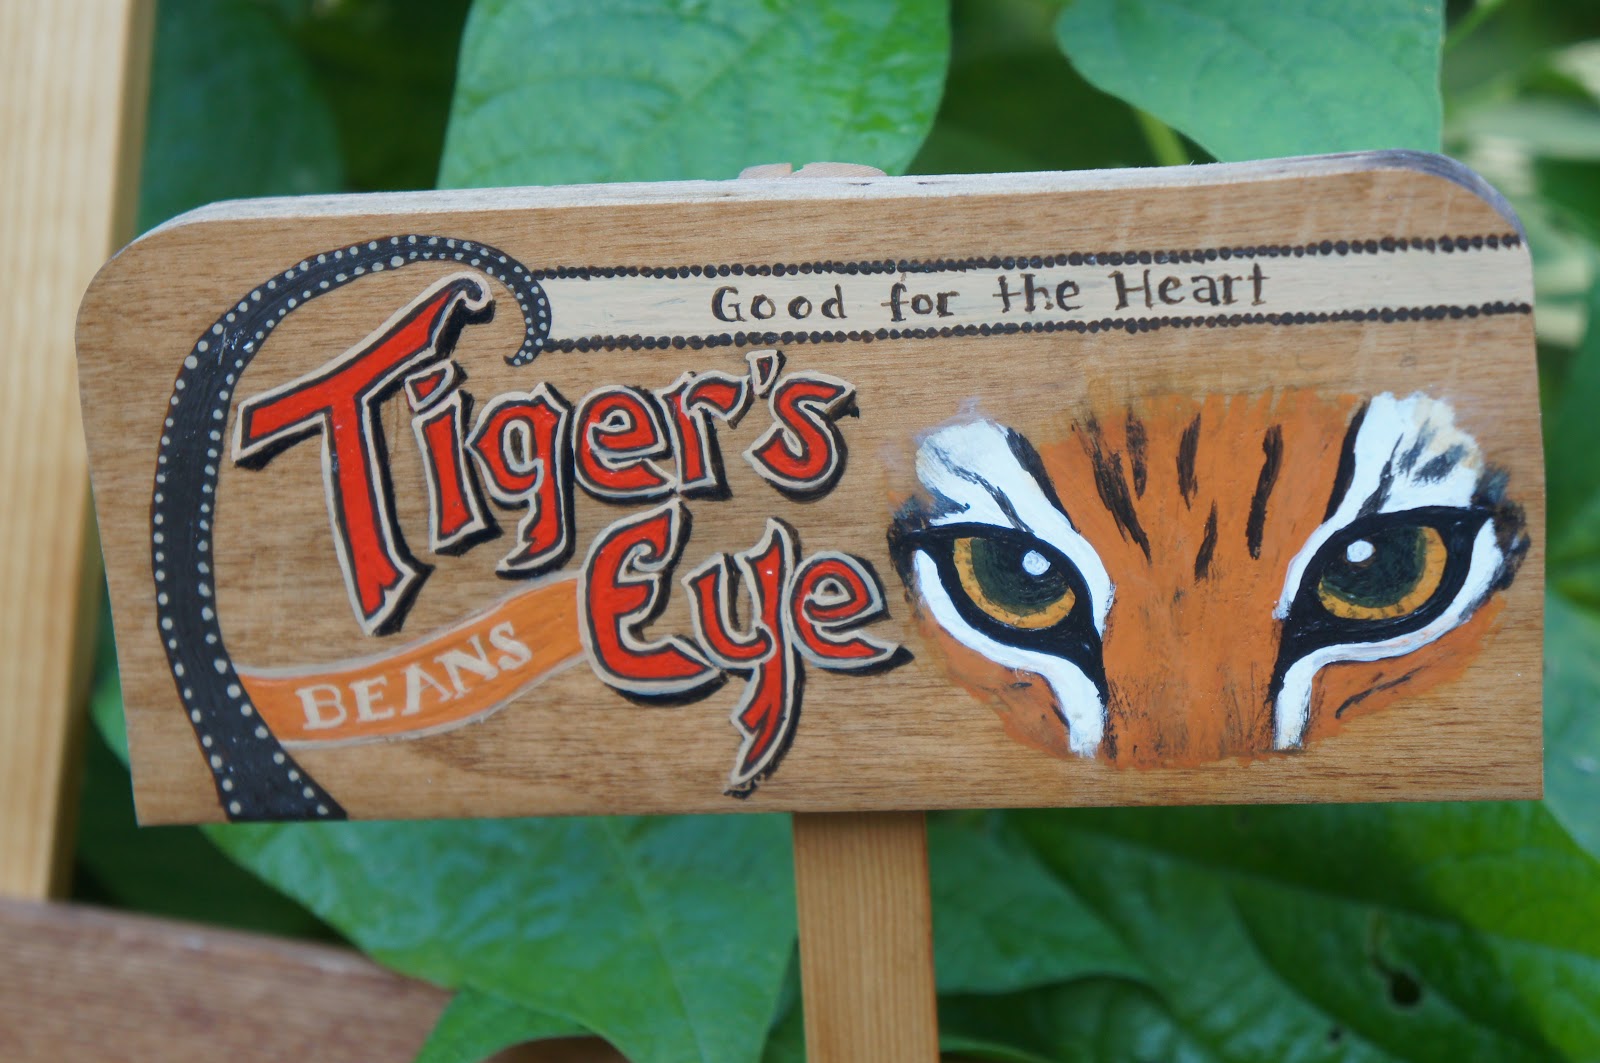
06/05, 06, 11, 14/2012 - "Tiger's Eye Beans" Plant Marker

I have said this about most of the plant marker, but this one really is my favorite! I got some seeds for these beans from one of my wonderful SCRAP volunteer friends.

Reclaimed Material: flooring/wood scraps
Other Material: none
Tools: paint and paintbrushes, screws, drill, polyurethane, wood glue


Random thoughts about this project: Since the markers are for the garden, I sprayed the heck out of them with polyurethane coating to protect them from the elements, watering, etc. I need to do my research about the polyurethane coating, but I didn't coat the bottom half of the stick, so I don't think there should be any worries of it leaching into the soil. That is just my uneducated guess though.


06/01-06/04/2012


06/01/2012 - Rubber Rose

This rose was fashioned using a long strip of rubber inner tube I sliced opened and wrapped around half of a bike spoke. I wrapped it multiple times before settling on a lame attempt at a rubber rose. I redid before taking the picture and it could not have been more perfect! I should know better by now, but 3 year old + perfect creation = disaster. Especially when trying to take a bunch of pictures. This is a so-so substitute and my perfect rubber rose will have to live on in my memory.


06/02/2012 - Patriotic Earrings
I am trying to come up with various ways to use old game pieces and was pleasantly surprised at how easy it is it drill holes in the plastic. The red balls are leftover from decorations on a Christmas present I had received. I am tempted to draw little clown faces on them because they look like little heads with hats on them.


06/03/2012 - ?????
I think I hear the voices of all of my high school teachers and my mother right now. Telling me that I should have written my project down right away. I haven't missed a day of experimental crafting, but I am annoyed I don't remember and can't find what I worked on. Here is a picture of my cute little one promising not to mess up this flower.


06/04/2012 - Plastic Ring Twirls
I desperately want to come up with an awesome craft for bottle rings. My intent was to twist these and make earrings. I twisted them by hand, wrapped them around pencils, lightly held a lighter under them to melt the metal, coiled them around a pencil and taped them, but still could not get them to match or to twirl the same way.