Showing posts with label bicycle. Show all posts

Sunday, October 21, 2012

07/01-07/18/2012

07/01/2012 -Rubber Band Headband
July 1st was a busy day for me. I worked all day then rushed home to get ready for my hubby to take me out for my wonderful birthday dinner. I didn't think I would want to work on anything after my hot date, so I did this project in the car ride to the restaurant. I cut 1/4" segments along the width of the tube. (If you are in a pinch and need rubber bands and have an inner tube, just cut the size you want by cutting through the width of the tube.) Then started pulling one band through the other to connect them together. I don't know how to describe the process, but when I got to the end I had to use a long strip to tie the ends together.


07/02-06/2012 - Really Big Inner Tube Basket
This is an offshoot from my 12 basket project for my sister-in-law. I love this giant size (2'x3') but the frame was too weak to support the rubber. This will be revisited with a stronger frame. Well, revisited four times since four baskets are needed.


07/07/2012 - Zoe's Lacey Skirt
This is another adult sized skirt that was stuck in with fabric at a fabric pricing party at SCRAP a few months prior. Zoe, of course, looks adorable wearing it. It reminds me of a girly steampunk skirt and I want to make a matching fitted vest and little top hat to go with it.


07/08/2012 - Practice Rubber Wrist Cuff
Wrist cuffs seem to be my "go to" craft. I think it was the first of my daily crafts. I made a practice cuff to lead a craft for Destination DIY's "Makin' It" Event on July 18th.


07/09-12/2012 - Camping Roll Slings
We have those wonderful self-inflating bed roll mattress thingies. The problem is containing them when not in use. I created a yoga mat-type sling to carry them and keep them together, out of, yes, you guessed it, rubber inner tubes. There are some kinks to be worked out, but I was happy with how they turned out. I got them done in time for out family camping trip.


07/13/2012 -Beer Can Lantern
Considering I freehand cut this lantern with a camping knife it didn't turn out too shabby. The ribbon I hung it from didn't seem like a good idea to combine with a citronella candle though.


07/14/2012 - Glow Bottle
I had read on Pinterest comment that you could make a glow bottle by opening a glow stick and pouring it in a water bottle filled with water. WRONG! I emptied about 6 glow sticks into a half filled water bottle before I finally gave up. All I could think of was those funny "nailed it" memes when people try to copy things from Pinterest. No photo of the lameness, but my sister-in-law did a hilarious thing where she taped glow sticks to herself to look like a stick figure lady. When it got really dark we walked around the campground cracking people up.


07/15/2012 - Rubber Wrist Cuffs
I was pretty pooped after getting home from our trip and made a simple rubber cuff to use as a sample for the Makin' It DIY event.
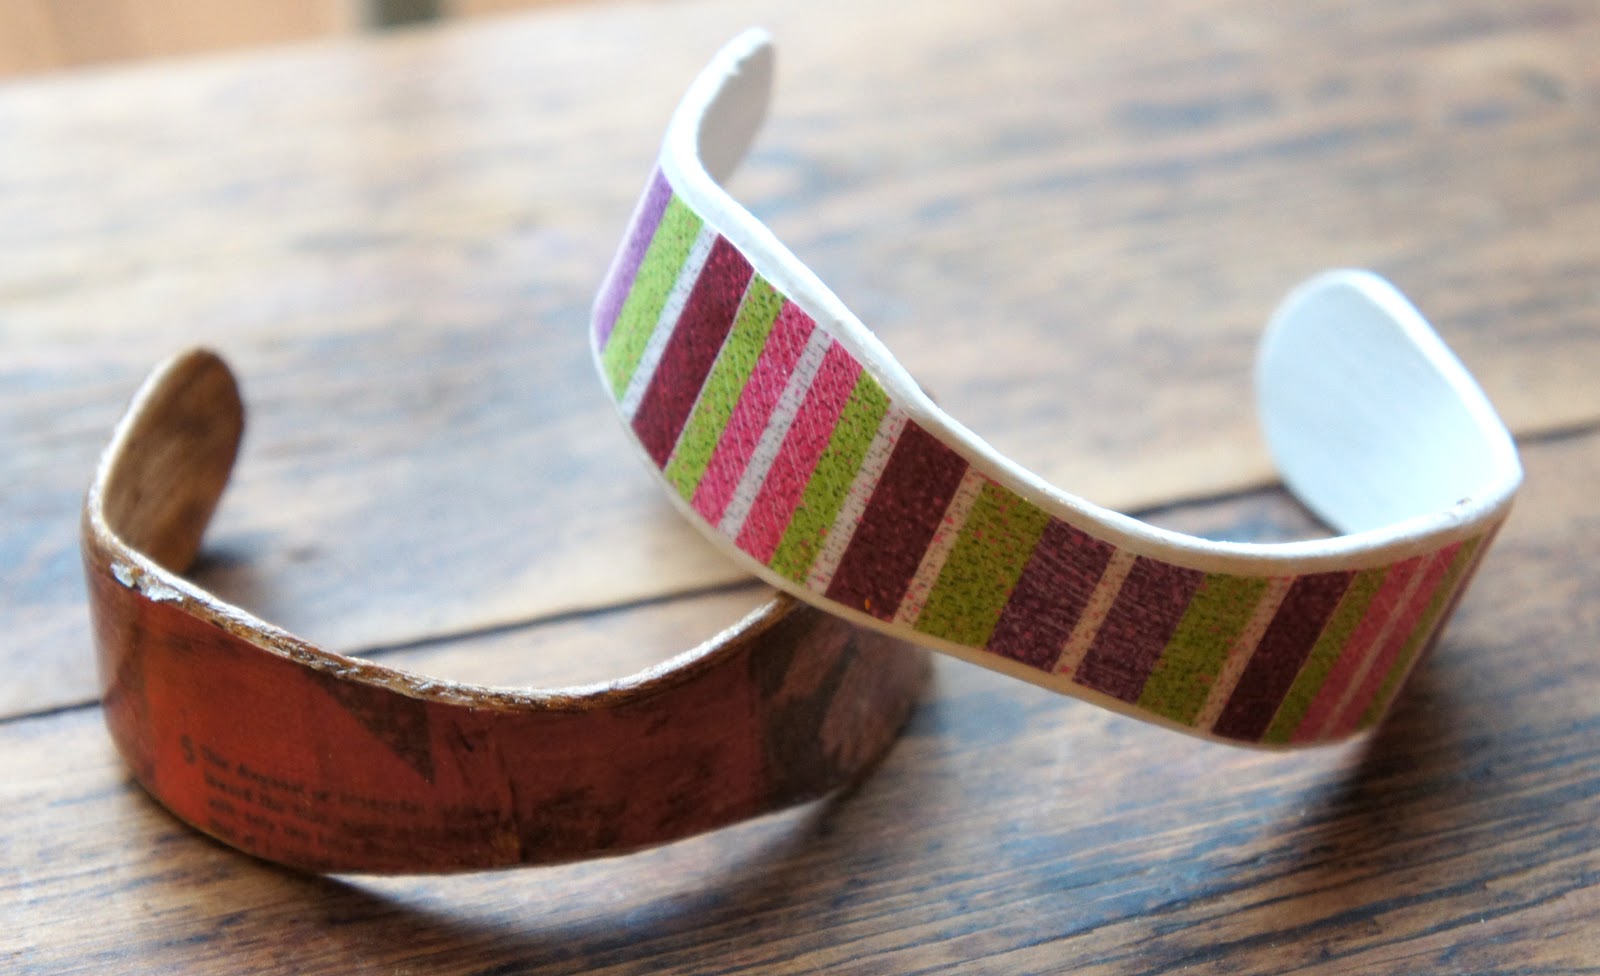


07/16/2012 - Wooden Bracelets
Another Pinterest attempt. I like how these turned out for the most part, but the white one didn't keep it's shape so it is too big to wear. I started the soaking process before the camping trip. Here are the instructions to give it a try: Wooden Bracelets.


07/17-18/2012 - More Wrist Cuffs 

I made a couple more examples of cuffs and led a quick tutorial at the Makin' It DIY event on the 18th. I didn't realize until a couple weeks later and had it pointed out by someone that this is not the peace symbol I intended. It was a big "duh" moment that I was showcasing an upcycled rubber cuff promoting the Mercedes Benz logo.

Wednesday, April 4, 2012

04/01/2012 - Bicycle Basket

This was a new basket that was turned into a recycled project. That normally goes against what I am trying to do, but this was for Jason's coworker. I guess she loves this style but the plastic weaving would always come loose, so she wanted it woven with rubber. I am a bit surprised at the transformation of this basket...it is cute as a button.

Reclaimed Material: rubber inner tubes, button
Other/New Material: plastic bicycle basket, safety pin
Tools: scissors

How I did it: I removed the plastic weaving from the basket then washed and cut strips of rubber to the same size as the plastic weaving I removed. I began weaving along the bottom and worked my way to the top. (The white vertical lines in the picture are part of the basket frame. I wrapped the top edge with rubber. I cut wider pieces of rubber and folded them in half, lengthwise, and did a twisty braid along the bottom and the top of the basket. I cut two different sized circles and cut them into flowers. I put the smaller one over the larger one and poked a small hole in the center and pushed the button (the kind with the mount on the back) through. I pulled the button notch through two lines in the weave and pinned it in place.

What I would do differently: I want to figure out how to make bicycle baskets using old bicycle spokes, but I think the spokes would need to be welded together. I couldn't resist adding the flower to the basket...I hope the coworker likes it.

Before
After

Tuesday, April 3, 2012

03/30/2012 - Basket Finish Work

I am really good at waiting until the last minute to finish things up. I think it is quite a skill really. I had the weaving done but needed to cover the corners and attach handles on all 12 baskets before my brother-in-law arrived to pick them up at 4pm.

Reclaimed Material: rubber inner tubes
 Other/New Material: screws, staples
Tools: scissors, drill, screwdriver, ruler, marker

How I did it: I dropped Zoe off at school and started cutting strips to cover the corners and started stapling them onto the baskets...then ran out of staples, grrrr. I ran to the hardware store and got the staples and met the most unhelpful employee there. The screws I had for the handles were not going to work so I asked him for help finding something similar. After his lack of assistance, I managed to find the screws I needed on my own, the hurried home. I finished the corners then measured 24 pieces of inner tube for handles. I measured and marked the hole placement for the handles -- 48 in all and drilled the holes. I had to poke the screws through 4 layers of rubber for both sides of the handle (I tried a hole punch but the screw heads were too small). I screwed in the handles by hand...of course I couldn't find a flat head drill bit, so it was all by hand. I finished this by about 3:45pm and thankfully Mark didn't arrive for another 40 minutes, so I had time to double check each basket to make sure the weaving was straight, etc. Phew. That was quite a day...and I still had to meet a 5pm deadline to submit my art pieces.

What I would do differently: NOT WAIT UNTIL THE LAST MINUTE! It was a stressful day and when I let myself wait until the last minute I run into problems like running out of supplies or not being able to find tools. It all worked out but I was pooped by the time 5pm rolled around.

03/29/2012 - Completion of Tree Art

I got news today that this piece was chosen to be in a First Thursday show...hooray. To be honest I didn't really figure out what "First Thursday" meant until I was talking to my mother-in-law about it and did a little web research. This and my Portland Bike Lane piece will be part of a 75% recycled show sponsored by SCRAP and Whole Foods. Can you notice anything strange about this picture?

Reclaimed Material: bicycle brake wire (cables)
Other/New Material: none
Tools: cable cutters, electrical tape

How I did it: I finished this piece by continuing to unravel the cables to make the various branches and tucking the ends under the canvas. I wanted to give a 3D effect to the piece, so I raised some of the "branches" and trimmed them at various lengths. I had to bend down the ends because each strand is razor sharp...I have the cuts to prove this. I trimmed off the excess wire from the back of the canvas and used the tape to hold the cables in place.

What I would do differently: Once I start a project I am really excited about I have a hard time sleeping because I just lay awake thinking about my next step, so I didn't get much sleep during this process. I should do things differently by getting more sleep, but it is hard to turn off creative processing mid-stream. I am very excited with how this turned out. My doggie, Max, was outside while I was taking this picture and is sitting right behind the piece so you can see his silhouette in the middle of the piece.

In case anyone reading this lives in the Portland Area, here is the information for the opening, but the pieces will be on display the whole month:

Monday, April 2, 2012

03/28/2012 - Brake Wire Tree

Trees are some of my favorite things. They are beautiful, unique--I can go on and on and on. I was so excited to start the tree once I finished the canvas. I was a little worried this wasn't going to turn out the way I wanted it to when I started the trunk, but as I kept going it came together nicely.

Reclaimed Material: bicycle brake wire
Other/New Material: electrical tape
Tools: brake wire cutters

How I did it: After I washed the wire/cables, I started with the trunk of the tree by using pieces of brake wire that had cable stops on the bottoms, yes, I was just told by my hubby that is the correct name. I threaded the wire through the weaves and twisted them randomly to give it more of a trunk look. I unraveled a strand of the brake wire and used it to hold the trunk in place by looping the strand around from underneath. After the trunk was completed, I spread out the brake wire to make the branches. I unraveled the ends of the brake wire branches to make smaller branches then tucked the ends between the weaves of the canvas.

What I would do differently: I need to be more careful with the brake wire because I got a lot of little cuts. I also scrubbed them before I started this project but there was grease in the nooks and crannies of the wires, so I think I should soak them overnight in Simple Green.

03/23/2012 - Last of the Basket Weaving

Holy moly! I did it! 12 baskets done, well, mostly done at that point. The project left my hands in need of some tlc and a good scrubbing. It felt good to have the bulk of the project done.

Reclaimed Material: rubber inner tubes
Other/New Material: staples 
Tools: hammer, staple gun, scissors

How I did it: See: original rubber basket project. 

What I would do differently: Moisturize my hands better during the process.

03/22/2012 - Baskets - there is an end in sight!

I had to do an inner tube run to my hubby's work to raid their tire/inner tube recycling bins. Apparently I have competition in raiding those bins, but there is plenty to go around and the artists who are also raiding the bins do awesome work - one makes belts and the other makes die cut bracelets. These tubes are really dirty though and filled with talc, so almost a week and half later I am still trying to get stains off my fingertips.
 
Reclaimed Material: rubber inner tubes
Other/New Material: staples
Tools: hammer, staple gun, scissors

How I did it: See: original rubber basket project. 

What I would do differently: I should have washed the second batch of tubes better.

03/21/2012 - You guessed it, baskets!

Knocked out two more...woot woot. I actually took one to a crafting affair called Makin' It with Destination DIY and got most of it done there. Super fun event with free beer and pizza, who could ask for anything more? I got to chat with some super talented crafters/creators/makers and check out their fabulous creations, all while listening to some groovy tunes. 

Reclaimed Material: rubber inner tubes
Other/New Material: staples
Tools: hammer, staple gun, scissors

How I did it: See: original rubber basket project. 

What I would do differently: Maybe I should have been drinking more beer during this project...I seemed to be really productive at the crafting party!

Sunday, April 1, 2012

03/20/2012 - Finished another basket

I saved all the finish work for these until the end. My biggest goal was to get the weaving done.

Reclaimed Material: rubber inner tubes
Other/New Material: staples 
Tools: hammer, staple gun, scissors

How I did it: See: original rubber basket project. One thing I haven't mentioned yet is that I covered the wood with rubber by stapling rubber pieces I splayed open on the sides of the wood that were going to be covered with the weaving.

What I would do differently: I still need to figure out a frame option that would be easy for me to make myself.

03/17/2012 - Making progress on the basket project

I didn't make 3 of these in one day, the chronicles of the baskets show them cumulatively.

Reclaimed Material: rubber inner tubes
Other/New Material: staples 
Tools: hammer, staple gun, scissors

How I did it: See: original rubber basket project. 

What I would do differently: Not applicable, or is it?

03/15/2012 - Another Basket

This was the official start of my 12 rubber basket project, so this will be dominating a few posts. I washed about 115 inner tubes in the bath tub and put a swimsuit on Zoe and her stomp on them like grapes to get them clean. Ah, what special mommy/daughter time.

Reclaimed Material: rubber inner tubes
Other/New Material: staples 
Tools: hammer, staple gun, scissors

How I did it: Thankfully I didn't have to build the frames for these baskets or I would probably still be working on them. The frames were built by professionals then I pretty much followed the same thing I did on the original rubber basket project.

What I would do differently: Since the prototype was a success, there is nothing to do differently.

Friday, March 30, 2012

03/09/2012 - Rubber Triangle Bracelet

I wanted to try something funky with a piece of inner tube, but I am not sure this translated well from the mental picture I had of this. This is kind of geometric, 80s-ish. I can't help but think of Jem and the Holograms. Wow, that makes me sou

Reclaimed Material: rubber inner tube
Other/New Material: none
Tools: scissors, X-acto knife 

How I did it: I cut a long triangle from the rubber long enough to fit around my wrist with a little bit of overlap. I cut two vertical slits on the short side of the triangle for the point to fit in.

What I would do differently: I should have cut the triangle longer. The point pulls out of the slits a bit. OK, sorry, that sounds worse than I mean it to, I am now getting my mind out of the gutter. This is really boring and needs some pizazz...glitter? sparkles? diamonds?

Thursday, March 22, 2012

03/07/2012 - Number Wind Chime

My homage to the first home Jason, Zoe and I had together. When we were getting the house ready for sale, we changed out the house numbers to help boost our "curb appeal". I wanted to take a nice picture of this hanging outside, but living in Oregon, the rain has not allowed that yet.

Reclaimed Material: metal numbers, bike cog, brake wire
Other/New Material: none
Tools: metal clippers, pliers

How I did it: I cut two pieces of the brake wire--which I had untwisted and used a couple strands for each number because there are about 30 different metal threads on each piece of brake wire. I threaded both pieces of wire through the holes in the cog so they were evenly spaced then attached the numbers to each end of the two strands, staggering them in the house number order - 4715. I took another strand of the wire and used it to make a hanger for the wind chime. 

What I would do differently: I think some kind of chain would have worked better than the wire.

Friday, March 16, 2012

02/20/2012 - Rubber/Antique Button Hairband

Yes, another headband...for a friend. I got this done the night before I went out of town so I just took a quick picture.

Reclaimed Material: rubber inner tube, antique(ish) button
Other/New Material: none
Tools: scissors, needle, thread, tape, paper

How I did it: Again, I did the same thing as the other headbands. My grandmother-in-law gave me some of her old sewing stuff and I found the awesome button for the middle of the flower.


What I would do differently: As you can see the flower rolls up on the sides. I found with some of the inner tubes that they roll up depending on how I cut them.

Wednesday, February 15, 2012

02/14/2012 - Bicycle Parts Picture Frame

The bicycle chain ring has been sitting in my craft supply pile for many years now. I always thought to myself "that looks so cool, I want to do something really neat with it." I have also been saving some thick clear plastic from the package of a toy my daughter got for Christmas. The frame I got from SCRAP PDX for the wood part so the back was just sitting around. I threw in some rubber, my favorite material of course, and a picture of Zoe and I and had a Valentine's present for my hubby.

Reclaimed Material: bicycle chain ring, inner tube, plastic packaging, back of picture frame
Other/New Material: tops of snaps, photograph
Tools: scissors, hand saw, epoxy, marker, clamp

How I did it: I used the marker to mark the shape of the chain ring on the frame backing (I adjusted the back so that the stand would hold the frame up properly). The frame back was narrower than the width of the ring so it does not cover the whole back. I clamped the frame back to a table and used the hand saw to cut along the marks. I then used that as a guide to cut out the hard plastic to be used as the "glass". I did not have a piece of inner tube wide enough to cover the inner circle in the chain ring so I used the epoxy to glue two pieces together. I used the clear plastic circle as a guide to cut out the picture and rubber then cut a circle in the middle of the rubber so it could be used as the matting for the frame. I glued the picture to the back of the frame, then the rubber. I glued the clear plastic piece onto the back of the chain ring and let the pieces set. I then glued the two pieces together. I used the tops of snaps to fill in the four large holes in the chain ring. 

What I would do differently: My original plan was to use snaps to attach the chain ring to the back of the frame so the picture could be changed, but the snaps were not long enough to be attached to the ring. I would like to figure out a way to make this a frame without having to use the stinky epoxy. It is a necessary evil when working with heavy duty materials.

Sunday, February 12, 2012

02/11/2012 - Tree Pendant

I really love working with metal bicycle parts and I have been trying to come up with ways to use them without any welding knowledge. I am not sure how I am going to end up using this piece, but I am happy with how the front turned out!

Reclaimed Material: bicycle cog, bicycle brake wire 
Other/New Material: none
Tools: heavy duty metal snipper, pliers

How I did it: The first thing I did was to thread the brake wire through 4 holes on one side of the cog. I only used two pieces of wire so I threaded each wire in a U-shape between two holes. Brake wire is made up of many little wires, and those little buggers are very sharp. I got a few metal splinters when I was digging through the box at the bike shop I got them from. I used the pliers to untwist each of the wires that make up the brake line to separate them. This was a little more difficult than I anticipated. Once all of the tiny wires were separated I bunched them together and twisted them together at the base as tightly as I could with the pliers to make the "trunk" of the tree. I then grouped smaller sections of the wire to make the "branches" and pulled the ends of the wire through the holes along the top of the cog. After the tree design was complete I twisted the wire together in a circle behind the metal part of the cog to make sure no sharp wires were sticking out.
 
What I would do differently: The only thing I am not completely satisfied with is the back of the pendant with the wires leftover from tree. I need to figure out a good way to hold the wires so that this can be used as a pendant. For now I think I will make a small frame to mount this on.

02/10/2012 - A Different Rubber Headband

This headband is for a friend's daughter, so I hope she likes pink! It is pretty much like the rubber headband I did a few days before with a few changes. 

Reclaimed Material: rubber inner tube, buttons
Other/New Material: decorative eyelet
Tools: scissors, needle, thread, tape, paper, Crop-A-Dile

How I did it: I followed the same steps I did for the headband I made from February 3, but made the center flower a little smaller and added a flower on either side of the larger one. Instead of using a button, I used a decorative eyelet I bought a long time ago. I thought it would be perfect to try and I am happy that it fit to hold the rubber pieces together. I used the Crop-A-Dile to attach the eyelet in the middle flower then found coordinating buttons for the smaller flowers.

What I would do differently: I ended up braiding the band again because it does stretch out and hold nicely. I think I am going to make some of these for my Etsy shop because I now have other design ideas floating around in my head.

Friday, February 10, 2012

Portland Bike Lane


I made this inner tube canvas a while back and I got inspired to work on this piece. I have been wanting to do a "road" picture on the tires of a bike lane because it seemed fitting with the inner tube. The frame is also a scrapped frame.

Available on Etsy: http://www.etsy.com/listing/92729563/portland-bike-lane

Monday, February 6, 2012

02/03/2012 - Rubber Headband

I get headaches from regular headbands and fabric headbands always slide off my head, so I have never had a good headband option...until now. The rubber makes a great headband because it stays in place and has enough elasticity to stay in place without squeezing my head or slipping off.


Reclaimed Material: rubber inner tube, button
Other/New Material: none 
Tools: scissors, needle, thread, tape, paper

How I did it: I used three strips of inner tube a little bit wider than 1/4" and 25" long each. I wrapped a small piece of tape around the three pieces on one end then did a regular braid and taped off the end. I fit the band to my head and stitched the ends that were overlapping. I wrapped an extra strip of rubber around the overlapping ends to cover them and did a small stitch to hold the cover in place. For the flower, I cut out my pattern on the paper then cut out two flowers using a wide piece of inner tube. Both flowers were sewn onto the headband then I found a coordinating button from my random box of buttons that everyone seems to have and sewed it on top of the flowers.

What I would do differently: Braiding the band looked nice, but the rubber strips kept twisting and the band curls up. I think doing a round braid or just using wider strips would work just as well.

Thursday, January 19, 2012

01/13/2012 - Rubber/Toy Wire Ring


I was still on my toy wire kick when I made this. I found a few pieces that I had saved that had a 2.5" plastic cover over it made me think of a ring...which led to the creation of this little guy.

Recycled Material: toy wire, small piece of rubber inner tube
Other Material: small beads, jewelry wire 
Tools: long nosed pliers, flower craft punch, scissors


How I did it: I used a flower-shaped craft punch to make two rubber flower shapes. This only required a couple inches of rubber so I used scraps from another project. If you don't have or want to buy a punch, scissors work just as well. I used the scissors to make a little hole in the center of both flowers to pull the wire through. I twisted two ends of the toy wire where the 2.5" cover met. This project would work just as well if you have toy wire without this random cover, just twist the toy wire where it will fit your finger. I then pulled both ends of the toy wire through the centers of both rubber pieces then gave the wire one more twist and separated the ends like in the picture. I put 4 small beads on a piece of jewelry wire and wrapped the wire so the beads were squared and then wrapped the wire from the bead around the two separated ends of the toy wire. I trimmed down the toy wire because I decided I liked the way the two pieces looked between the rubber and the beads.

What I would do differently: This is a repeat project but I will try some different designs on top next time. I am finding that this toy wire is really versatile, so next time you come across some, save it to use as a twist tie or to meet any of your small wiring needs. I also need to file down the ends of the toy wire pieces on top because the wire is sticking out the plastic a little.