Showing posts with label bike. Show all posts

Sunday, October 21, 2012

07/01-07/18/2012

07/01/2012 -Rubber Band Headband
July 1st was a busy day for me. I worked all day then rushed home to get ready for my hubby to take me out for my wonderful birthday dinner. I didn't think I would want to work on anything after my hot date, so I did this project in the car ride to the restaurant. I cut 1/4" segments along the width of the tube. (If you are in a pinch and need rubber bands and have an inner tube, just cut the size you want by cutting through the width of the tube.) Then started pulling one band through the other to connect them together. I don't know how to describe the process, but when I got to the end I had to use a long strip to tie the ends together.


07/02-06/2012 - Really Big Inner Tube Basket
This is an offshoot from my 12 basket project for my sister-in-law. I love this giant size (2'x3') but the frame was too weak to support the rubber. This will be revisited with a stronger frame. Well, revisited four times since four baskets are needed.


07/07/2012 - Zoe's Lacey Skirt
This is another adult sized skirt that was stuck in with fabric at a fabric pricing party at SCRAP a few months prior. Zoe, of course, looks adorable wearing it. It reminds me of a girly steampunk skirt and I want to make a matching fitted vest and little top hat to go with it.


07/08/2012 - Practice Rubber Wrist Cuff
Wrist cuffs seem to be my "go to" craft. I think it was the first of my daily crafts. I made a practice cuff to lead a craft for Destination DIY's "Makin' It" Event on July 18th.


07/09-12/2012 - Camping Roll Slings
We have those wonderful self-inflating bed roll mattress thingies. The problem is containing them when not in use. I created a yoga mat-type sling to carry them and keep them together, out of, yes, you guessed it, rubber inner tubes. There are some kinks to be worked out, but I was happy with how they turned out. I got them done in time for out family camping trip.


07/13/2012 -Beer Can Lantern
Considering I freehand cut this lantern with a camping knife it didn't turn out too shabby. The ribbon I hung it from didn't seem like a good idea to combine with a citronella candle though.


07/14/2012 - Glow Bottle
I had read on Pinterest comment that you could make a glow bottle by opening a glow stick and pouring it in a water bottle filled with water. WRONG! I emptied about 6 glow sticks into a half filled water bottle before I finally gave up. All I could think of was those funny "nailed it" memes when people try to copy things from Pinterest. No photo of the lameness, but my sister-in-law did a hilarious thing where she taped glow sticks to herself to look like a stick figure lady. When it got really dark we walked around the campground cracking people up.


07/15/2012 - Rubber Wrist Cuffs
I was pretty pooped after getting home from our trip and made a simple rubber cuff to use as a sample for the Makin' It DIY event.
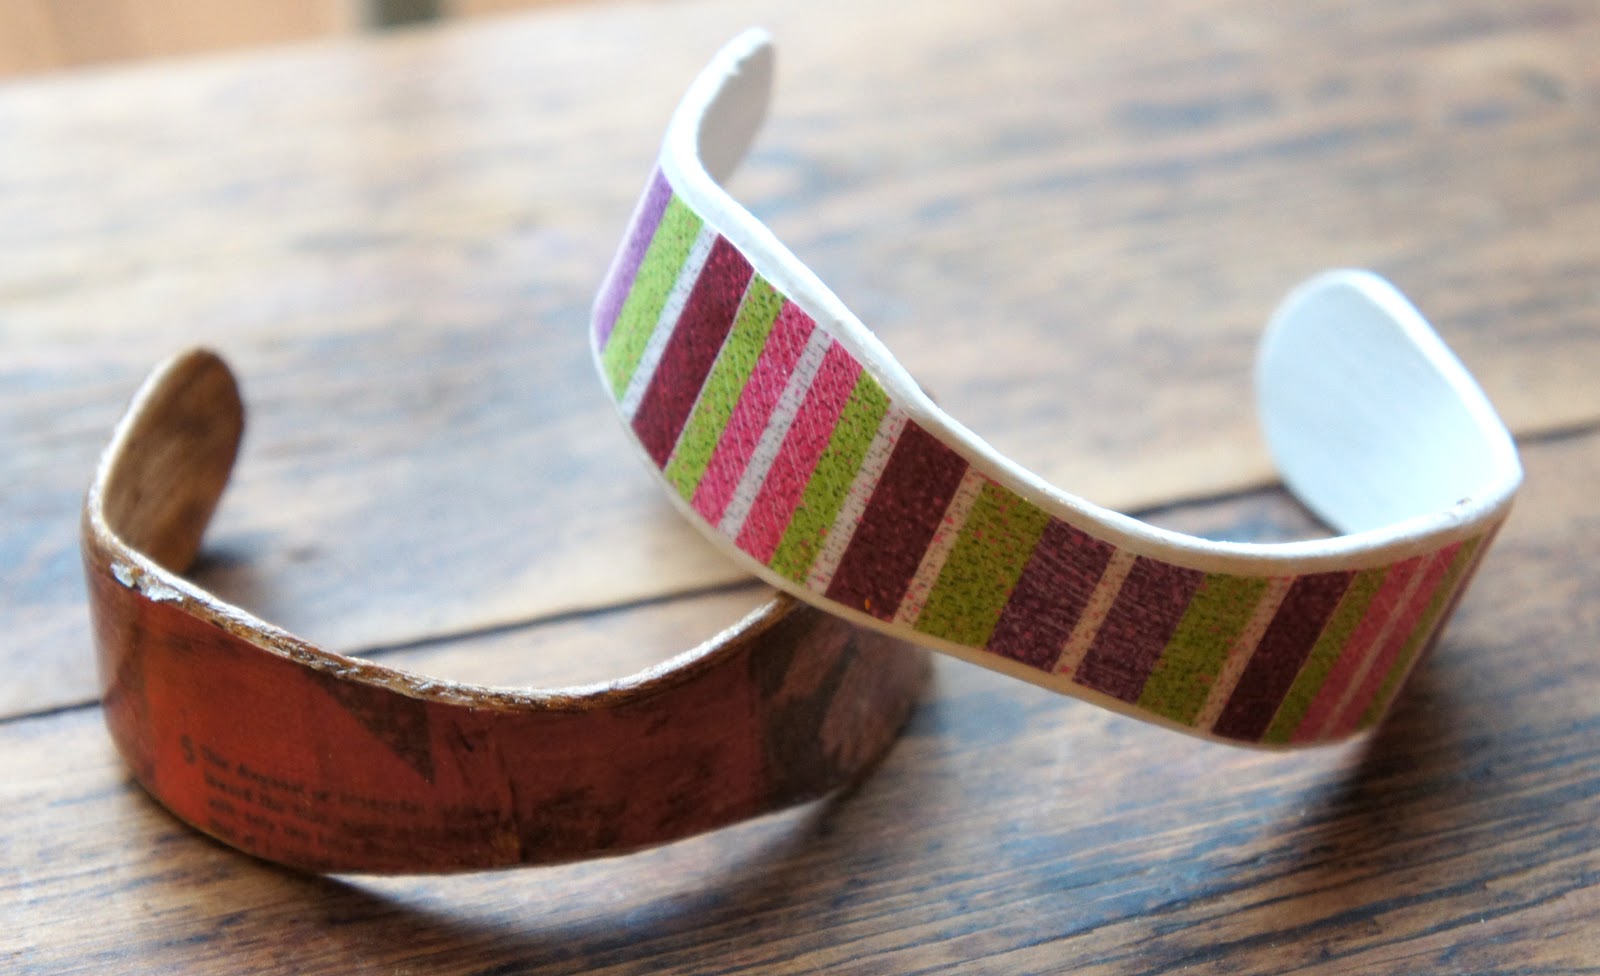


07/16/2012 - Wooden Bracelets
Another Pinterest attempt. I like how these turned out for the most part, but the white one didn't keep it's shape so it is too big to wear. I started the soaking process before the camping trip. Here are the instructions to give it a try: Wooden Bracelets.


07/17-18/2012 - More Wrist Cuffs 

I made a couple more examples of cuffs and led a quick tutorial at the Makin' It DIY event on the 18th. I didn't realize until a couple weeks later and had it pointed out by someone that this is not the peace symbol I intended. It was a big "duh" moment that I was showcasing an upcycled rubber cuff promoting the Mercedes Benz logo.

Sunday, April 1, 2012

03/18/2012 - More and more baskets

I managed to add 2 more baskets to the grouping. Zoe grew tired of the baskets after me sitting and making 5 of them and came running in with her "magic wand" and said, "Abracadabra make these baskets disappear! Mom, stop working on the baskets! Abracadabra make all this rubber disappear!" Her magic skills need some work because they did not disappear.

Reclaimed Material: rubber inner tubes
Other/New Material: staples 
Tools: hammer, staple gun, scissors

How I did it: Still doing the same thing: rubber basket. 

What I would do differently: Get Zoe some magic lessons.

Wednesday, February 15, 2012

02/14/2012 - Bicycle Parts Picture Frame

The bicycle chain ring has been sitting in my craft supply pile for many years now. I always thought to myself "that looks so cool, I want to do something really neat with it." I have also been saving some thick clear plastic from the package of a toy my daughter got for Christmas. The frame I got from SCRAP PDX for the wood part so the back was just sitting around. I threw in some rubber, my favorite material of course, and a picture of Zoe and I and had a Valentine's present for my hubby.

Reclaimed Material: bicycle chain ring, inner tube, plastic packaging, back of picture frame
Other/New Material: tops of snaps, photograph
Tools: scissors, hand saw, epoxy, marker, clamp

How I did it: I used the marker to mark the shape of the chain ring on the frame backing (I adjusted the back so that the stand would hold the frame up properly). The frame back was narrower than the width of the ring so it does not cover the whole back. I clamped the frame back to a table and used the hand saw to cut along the marks. I then used that as a guide to cut out the hard plastic to be used as the "glass". I did not have a piece of inner tube wide enough to cover the inner circle in the chain ring so I used the epoxy to glue two pieces together. I used the clear plastic circle as a guide to cut out the picture and rubber then cut a circle in the middle of the rubber so it could be used as the matting for the frame. I glued the picture to the back of the frame, then the rubber. I glued the clear plastic piece onto the back of the chain ring and let the pieces set. I then glued the two pieces together. I used the tops of snaps to fill in the four large holes in the chain ring. 

What I would do differently: My original plan was to use snaps to attach the chain ring to the back of the frame so the picture could be changed, but the snaps were not long enough to be attached to the ring. I would like to figure out a way to make this a frame without having to use the stinky epoxy. It is a necessary evil when working with heavy duty materials.

Friday, February 10, 2012

Portland Bike Lane


I made this inner tube canvas a while back and I got inspired to work on this piece. I have been wanting to do a "road" picture on the tires of a bike lane because it seemed fitting with the inner tube. The frame is also a scrapped frame.

Available on Etsy: http://www.etsy.com/listing/92729563/portland-bike-lane

Thursday, January 19, 2012

01/13/2012 - Rubber/Toy Wire Ring


I was still on my toy wire kick when I made this. I found a few pieces that I had saved that had a 2.5" plastic cover over it made me think of a ring...which led to the creation of this little guy.

Recycled Material: toy wire, small piece of rubber inner tube
Other Material: small beads, jewelry wire 
Tools: long nosed pliers, flower craft punch, scissors


How I did it: I used a flower-shaped craft punch to make two rubber flower shapes. This only required a couple inches of rubber so I used scraps from another project. If you don't have or want to buy a punch, scissors work just as well. I used the scissors to make a little hole in the center of both flowers to pull the wire through. I twisted two ends of the toy wire where the 2.5" cover met. This project would work just as well if you have toy wire without this random cover, just twist the toy wire where it will fit your finger. I then pulled both ends of the toy wire through the centers of both rubber pieces then gave the wire one more twist and separated the ends like in the picture. I put 4 small beads on a piece of jewelry wire and wrapped the wire so the beads were squared and then wrapped the wire from the bead around the two separated ends of the toy wire. I trimmed down the toy wire because I decided I liked the way the two pieces looked between the rubber and the beads.

What I would do differently: This is a repeat project but I will try some different designs on top next time. I am finding that this toy wire is really versatile, so next time you come across some, save it to use as a twist tie or to meet any of your small wiring needs. I also need to file down the ends of the toy wire pieces on top because the wire is sticking out the plastic a little.

Wednesday, January 18, 2012

01/10/2012 - Rubber Circle Bracelet

This is one of those projects that just happened. I started cutting out rubber circles with a different project in mind, but it evolved into this bracelet. 

Recycled Material: rubber inner tube
Other Material: jewelry wire, beads

Tools: scissors, 2" round craft punch, long nose pliers


How I did it: As with most of my rubber projects, I cleaned and prepared the inner tube by slicing it open before I started cutting. I used a 2" Fiskars round craft punch to make circles - I made about 14 circles. The inner tube that I used was a tad bit thick so it took a few pressed of the punch and a little bit of pulling the circle out to make it work. I ended up using scissors to cut out the inner circle so the width around was 3/16". I then overlapped the edges of two circles and used the jewelry wire with a faux pearl strung on it to connect them. I tucked the ends of the wire between the two rubber pieces and clamped the wire down with the pliers. I wired 4 circles together like this then connected the first and last circle to make the bracelet. I then repeated this process on a separate bracelet then put one over the other so the edges of two of the circle from the top bracelet were centered over the middle of the circles on the bottom bracelet. I did not attach the two bracelets together because I think it would have made it look to "clunky".

What I would do differently: I am quite pleased with how this turned out so I wouldn't change anything on the structure of the bracelet. I used some cheap pearls left over from a project I did a few years back, so next time I will use a nicer bead. My mother-in-law suggested using silver beads, which I think would look really nice. One thing that I would love to figure out is how to drill holes in bicycle ball bearings to make beads. I asked my hubby, the bike mechanic, if this is possible and he said they are made with stainless steel and would be hard to clamp and to get the drill set to make a hole. I am stubborn though and will probably give it a try anyway...with safety glasses so I don't lose an eye.

Monday, January 16, 2012

01/09/2012 - Rubber Round Braided Bracelet

Round braiding is something I have wanted to figure out for a long time. I have only seen leather given this treatment, but thought rubber would work nicely as well.

Recycled Material: rubber bicycle inner tube
Other Material: none
Tools: scissors, safety pin

How I did it: As just about everyone does now days I turned to the internet on my quest to learn how to make a round braid. I came across some interesting instructions (even some for an adult harness made using round braids - yikes - ok, that was kind of amusing) but the clearest instructions I found were on eHow "How to Round Braid Leather". I cut the inner tube into 4 strips about 1/8" wide and about 18" long (longer than it needed to be) then followed the eHow instructions. The only thing I didn't do from the instructions was clamp it to a bench or table. Yes, I went through my friendship bracelet phase once upon a time so I just used a safety pin and pinned it to the knee of my jeans.

What I would do differently: I did try this with thinner strips originally, but they were square instead of flat so the strips kept twisting when I braided them and it was too small to tell during the braiding process. I am going to try doing this braid using more pieces and also experiment with the widths of the strips. I think it would be fun to see if I could incorporate beads into this too.

Thursday, January 12, 2012

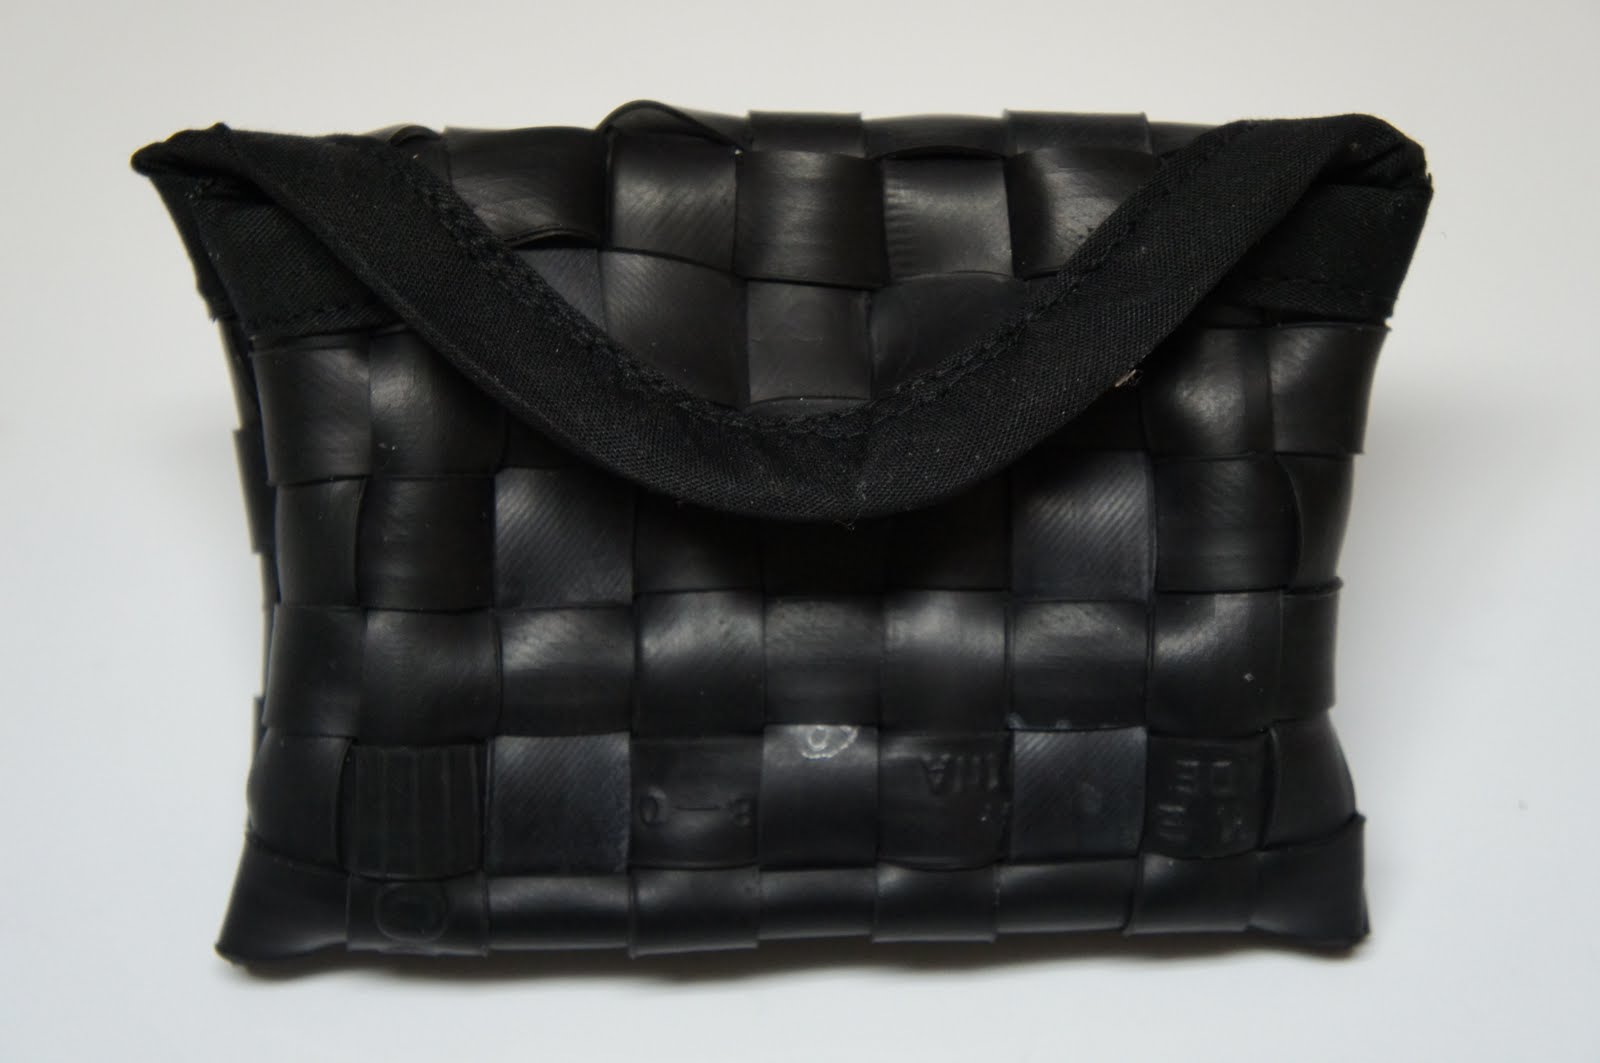
01/02/2012 - Coin Purse

Weaving rubber inner tubes is actually more difficult than it looks. I have started larger rubber weaving projects before, but got too frustrated and gave up on them. For my second project, I gave it another go...on a smaller scale. The strips of inner tube slip and don't like to stay flush with the other strips. I think this is because of the thickness. I went to SCRAP PDX last week and found a simple loom that I am going to try weaving rubber and hope it works better than taping pieces to my glass board.

Recycled Material: rubber inner tube
Other Material: heavy tape (I like using electrical tape on rubber) thread, bias tape or something for edging, snap
Tools: scissors, needle and thread or sewing machine

How I did it: I cut inner tubes into strips that are 1/2" wide. Some inner tubes (usually road bike inner tubes) have lines that measure about this width and make cutting a lot less of a headache. I find it easier to cut the length of the tire then cut down the sizes I need. Then I cut 9 of the strips to 10" lengths and 16 strips to 6/5" lengths (this will give you extra room to work and allow about 1/2" edges). The size of the finished product is 3"x4.5". As I said above, I used a glass cutting board, then taped the 9 long strips flush against each other - I only taped along the top and left the bottom loose. Then I took one of the shorter strips and wove it through the longer strips, one over and one under. Make sure the pieces of rubber are all facing the right direction. Then repeated the process for the remaining 15 strips, alternating which one started on top and vice versa. I call this making my "fabric" when working with recycled/discarded materials.

Once the "fabric" was done, I used the electrical tape to measure out the exact size of the purse - 4.5" x 8" but I only taped the bottom and two long sides up to 6". For the remaining 2" I rounded the tape starting at the 6" mark and made the highest point 8". The bottom was folded in half 3" up (inside out) and the remaining rounded 2" was left for the closure flap. I also did a simple stitch to hold the weave together on the short and rounded ends removing the electrical tape as I went along then lined the bias tape on the short ends and used a sewing machine with the tension set to "9" using a leather needle. Once the edges that were going to show were covered, I hand (back) stitched the sides 3" up with the "fabric" inside out on each side using a large needle removing the tape as I stitched (it is a pain in the you-know-what to stitch rubber by itself on my little machine so it was just easier to do it by hand).

Once the coin purse was put together, I turned it inside out then marked the placement of the snap. Originally I used a magnetic closure for it, but it was overkill and just stretched the rubber, so I removed it and used a regular sew-on snap. I hid my stitches behind the weave. I left it sitting out to take a picture of it and my sweet little 88 year-old grandmother-in-law walked up and asked me if I made it for her. How could I say "no"?

What I would do differently: I would probably do a lining because the rubber still stretches a little bit when you pull on the snap, but not as badly as it did with the magnetic closure. Like I mentioned earlier, I am going to see how the loom I got works out, otherwise I am going to have to figure out an easier solution by fashioning something homemade.

01/01/2012 - Rubber Cufflet

I guess you could call this a little bit of a cop out since I have made these a couple times before...but it has been a few years. For my first recycled craft I made for 2012, I made a recycled rubber inner tube cuff. I liked using this piece of rubber because it has a purple line running down the center.

Recycled Material:
rubber inner tube
Other Material: eyelets, snaps (for leather)
Tools: scissors, eyelet setter (or Crop-A-Dile), snap setter, hammer

How I did it: First I sliced the rubber to a 2" width then cut the length to fit my wrist leaving overlap to set the snaps. I always wash or wipe down the rubber because I have ended up with some gross stuff on my hands on other inner tube projects (the tubes usually have some kind of talc on the inside and dirt/oil/gunk on the outside...there is even sometimes green goo from people who temporarily fixed their flats). I used the directions included with the snaps, then marked where I wanted the snaps and set them...I probably could have gotten away with one since the snaps for leather are pretty heavy duty. I then marked the placement for the eyelets - one inch apart. I used my Crop-A-Dile (I highly recommend buying one when Michael's or JoAnn Fabrics has a 50% of coupon because I love mine) to punch the holes and set the eyelets.

What I would do differently: The thing that I did not like too much were the square eyelets because they were too chintzy (I think they were for scrapbooking). I will probably end up changing to a more sturdy round eyelet even though I like how the square ones look. I have a serious issue for using things for something other than their intended purpose.