 09/01/2012 - Leather Belt Cuff
Grandma BJ had given me her husband's old work belt he wore for many years. I cut it down to make, yes, you guessed it, a wrist cuff. It already had decorative stitching on it, so I added some decorative studs and added a snap and viola, had a beautiful leather cuff. She was so happy to have something to wear that belonged to her hubby. Her reaction was so sweet and touched my heart.
09/02/2012 - Metal/Rubber Basket
Finish Work
 I finished up some tucking and weaving to the metal framed baskets I made in August. It was an uninspired day, so I caught up on those. I think I still want to add some rivets or something to them. That just could happen yet.
09/03-04/2012 - Finishing up wooden Bible Box
 I started this project in July with the best intentions of having this done in time for my mom's birthday, just three short days after I finished this project! I finished hollowing out the center with a chisel then painted it to match the spine. I still managed to break off a little piece of the inside after I painstakingly hollowed out the inside without any problems. I added a little red ribbon to look like a Bible bookmark and closed it up.
 09/05/2012 - Wooden Bible Verse
I wanted to put one of my mom's favorite verses inside the wooden Bible box, but couldn't find the right material to use. I ended up taking a scrap of craft wood and painting it to look old-ish. It had to be really small to fit in the box, so I used a thin sharpie to write out the verse. I was kind of disappointed, but should have known better, when it started to bleed. Hopefully my momma doesn't hold it against me!
 09/06-07/2012 - Zoe Photo Transfer
Another *as seen on Pinterest* project! I transferred Zoe's picture onto a canvas I got from SCRAP. It was a 9"x12" canvas though and my printer only does 8.5"x11". I printed it in half, but it left a line going through her forehead. I tried to disguise it as best I could with paint and at least the finish was supposed to look worn. I am still proud of how this looks. I also found out how spoiled I have gotten getting most of my supplies at SCRAP. I had to go to a big box craft store and buy gel medium, and that stuff is spendy!
09/08/2012 - Hunter’s Name Plaque

I really am a kid at heart. I think I have more fun making these than the kids have receiving them. I used plastic lids, wood scraps, game pieces, fabric bits, foam core scraps and an old frame to make this. I did have to use clay to make the "H" so it would look like stonework on a castle though. I need to find more names and themes to do.
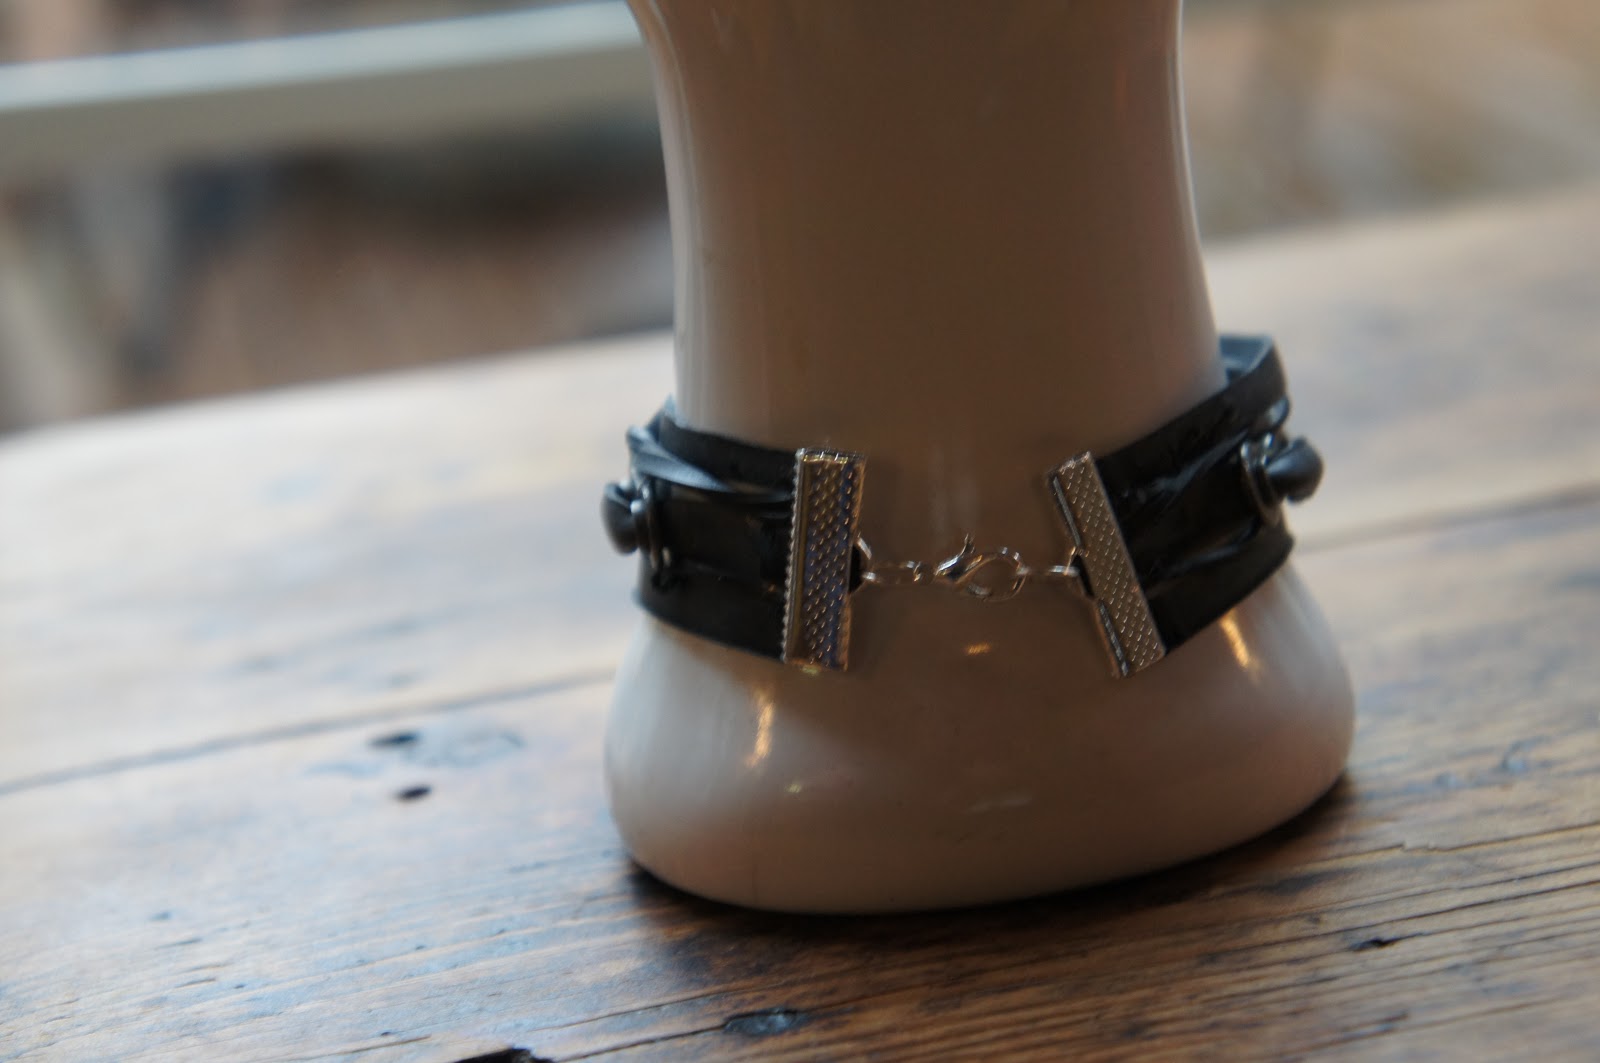 09/09/2012 - Rubber Chain Strand
Bracelet with Crimps
09/09/2012 - Rubber Chain Strand
Bracelet with Crimps
I finally found the crimps for making these strand bracelets! It took me a while, or I could have just been looking in all the wrong places. I used various widths of the rubber strands and added chain links to one and twisted another to give it some movement.
09/10/2012 - “Shrinky Dinks” Jewelry

 09/11/2012 - OMSI Tire Roads
I haven't mentioned my OMSI project in my posts yet, but my proposal to create a wall sculpture regarding sustainability in transportation was chosen by the Oregon Museum of Science and Industry. I had started working on it since early August, but as the 10/1 deadline approached, most of my creative powers were focused on the sculpture. The roads were created using a deconstructed chair frame, bicycle tires and shoe laces and reflective strips for the lines. I used a staple/brad gun to attached the rubber to the wooden frame. I ended up decoupaging old maps to cover the sides of the wooden frame that showed below the rubber.

09/12/2012 - Fish Tail Braid Rubber Bracelet
For grins and giggles I tried doing a fish tail braid from a whole inner tube. It looks neat, but was a little more difficult to manipulate than when I slice the tubes.
 09/13/2012 - Men’s Tire Cuff
Until I started the OMSI project, I stuck to inner tubes instead of tires because they are so still and hard to use. I made this cool looking men's cuff, but ran into a hiccup when I tried to add snaps. The barrel (not sure of technical term) of the snap was to short to attach to the thickness of the tire and fabric. I also ran into the same issue with other tire projects. I may have to re-tire from this project. Hoo hoo, haa haa, hee hee. The fabric on the ends is an upholstery sample.
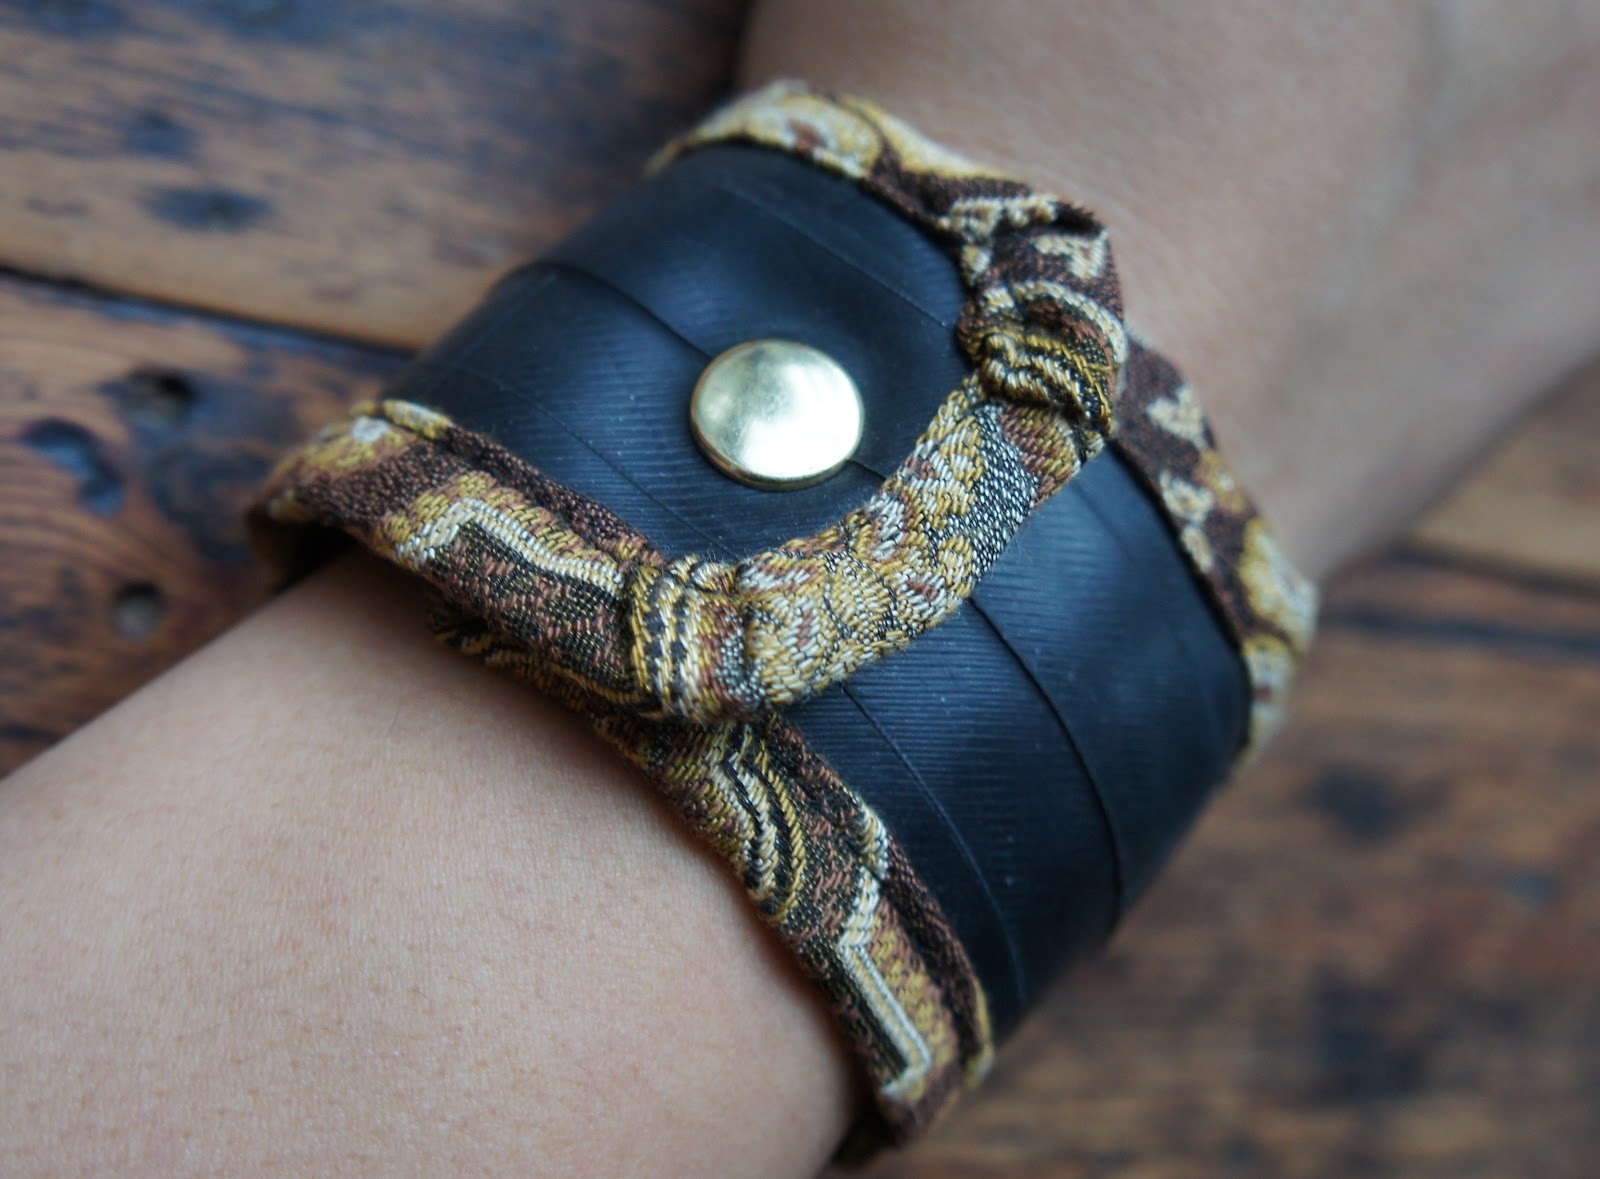
09/14/2012 - Ladies’ Inner Tube Cuff
Using the same upholstery sample as the men's cuff, I stitched it to the back of an inner tube piece and added a snap to make this cuff.
 09/15/2012 - Zoe Tile Coaster
Using a tile left over from another project, I decoupaged a baby picture onto it to make a coaster. I was originally trying a different method that was supposed to transfer the image directly onto the tile, but after a few attempts it still didn't work. After some time on Google, I found out that for the image transfer to work, it had to be a toner image, not ink. Good thing I gave up and just used the whole picture.
 09/16/2012
- Funky Shape Tire Cuff
09/16/2012
- Funky Shape Tire Cuff
There are some interesting patterns on tire treads. I cut a funky little shape out of one of the tire scraps I had from the "roads" I made, but ran into the issue of the snaps again. Leather snaps just don't cut it with rubber.
 09/19/2012
- Rubber Multi-strand Flower Bracelet
09/19/2012
- Rubber Multi-strand Flower Bracelet
I was inspired by a necklace my sister-in-law had from Sweden for making this. The necklace was much fancier, but the button makes this cute, well, as a button. I cut the strands and flowers from rubber then used wire to fasten the button to the flower and the strands.
 09/20/2012 - Metal Brad Chain
While working on the OMSI piece, I went through a lot of brads and wasted quite a few. I took some little pliers and worked the brads into a little chain. Not sure what I will do with it, but I am happy they weren't wasted.
 09/21-30/2012 - "Process to Progress"
Jason helped me come up with the name of this piece. It really is a process of making changes, like incorporating other forms of transportation into our lives than just jumping in the car to get somewhere. If is through various processes that we can see change.
09/21-30/2012 - "Process to Progress"
Jason helped me come up with the name of this piece. It really is a process of making changes, like incorporating other forms of transportation into our lives than just jumping in the car to get somewhere. If is through various processes that we can see change.
 I put in many hours in this piece and concentrated my focus at the end of the month to working on the piece. I am truly excited about how it turned out and that I have a piece in a museum. I will provide more details later on. I am just now caught up with September, so baby steps.
Using the same upholstery sample as the men's cuff, I stitched it to the back of an inner tube piece and added a snap to make this cuff.
 09/15/2012 - Zoe Tile Coaster
Using a tile left over from another project, I decoupaged a baby picture onto it to make a coaster. I was originally trying a different method that was supposed to transfer the image directly onto the tile, but after a few attempts it still didn't work. After some time on Google, I found out that for the image transfer to work, it had to be a toner image, not ink. Good thing I gave up and just used the whole picture.
 09/16/2012
- Funky Shape Tire Cuff
09/16/2012
- Funky Shape Tire CuffThere are some interesting patterns on tire treads. I cut a funky little shape out of one of the tire scraps I had from the "roads" I made, but ran into the issue of the snaps again. Leather snaps just don't cut it with rubber.
09/17/2012 - Martha Stewart Flower
 Take her or leave her, Martha does come up with some great ideas. I saw these cute little flowers that were, I think, originally made with felt and sewn onto a pillow. As with most projects, I felt the need to see if it could be translated into rubber. It could! I haven't decided what to do with my sweet little flower yet, but it may resurface before my year of crafting is over. Here are the directions: Martha Stewart flower.
 Take her or leave her, Martha does come up with some great ideas. I saw these cute little flowers that were, I think, originally made with felt and sewn onto a pillow. As with most projects, I felt the need to see if it could be translated into rubber. It could! I haven't decided what to do with my sweet little flower yet, but it may resurface before my year of crafting is over. Here are the directions: Martha Stewart flower.
09/18/2012 - Process to Progress Signs
 Since I found out that my proposal for the OMSI exhibit was chosen, I tried to gather transportation-related waste to create my piece. I got turned down by transportation agencies and public works departments to even get small bits for the piece. I finally had luck with TriMet, which provides public transportation to the Portland metro area. I was so excited to get giant acrylic signs from them to incorporate into my piece! They were so helpful and great! I used a jigsaw to cut the signs to the shapes of street signs. This was harder than I anticipated. Thankfully, Jason had gotten me some heavy duty cardboard that I used under the signs to cut them. The heat of the saw made the cardboard stick the acrylic though and I had a lot of sanding to do afterwards.
 Since I found out that my proposal for the OMSI exhibit was chosen, I tried to gather transportation-related waste to create my piece. I got turned down by transportation agencies and public works departments to even get small bits for the piece. I finally had luck with TriMet, which provides public transportation to the Portland metro area. I was so excited to get giant acrylic signs from them to incorporate into my piece! They were so helpful and great! I used a jigsaw to cut the signs to the shapes of street signs. This was harder than I anticipated. Thankfully, Jason had gotten me some heavy duty cardboard that I used under the signs to cut them. The heat of the saw made the cardboard stick the acrylic though and I had a lot of sanding to do afterwards.
  09/19/2012
- Rubber Multi-strand Flower Bracelet
09/19/2012
- Rubber Multi-strand Flower BraceletI was inspired by a necklace my sister-in-law had from Sweden for making this. The necklace was much fancier, but the button makes this cute, well, as a button. I cut the strands and flowers from rubber then used wire to fasten the button to the flower and the strands.
 09/20/2012 - Metal Brad Chain
While working on the OMSI piece, I went through a lot of brads and wasted quite a few. I took some little pliers and worked the brads into a little chain. Not sure what I will do with it, but I am happy they weren't wasted.
 09/21-30/2012 - "Process to Progress"
 I put in many hours in this piece and concentrated my focus at the end of the month to working on the piece. I am truly excited about how it turned out and that I have a piece in a museum. I will provide more details later on. I am just now caught up with September, so baby steps.
Great stuff. I hope you're still at it. 🙂
ReplyDelete