 08/01-2/2012 - Woven Coin Purse
My intention was to make this a little bigger to fit cards, but I cut it a little too small. It is a really cute little coin purse which I have been meaning to make for myself anyway. I used a loom to weave this so the process did go much faster than the one I had made earlier in the year.

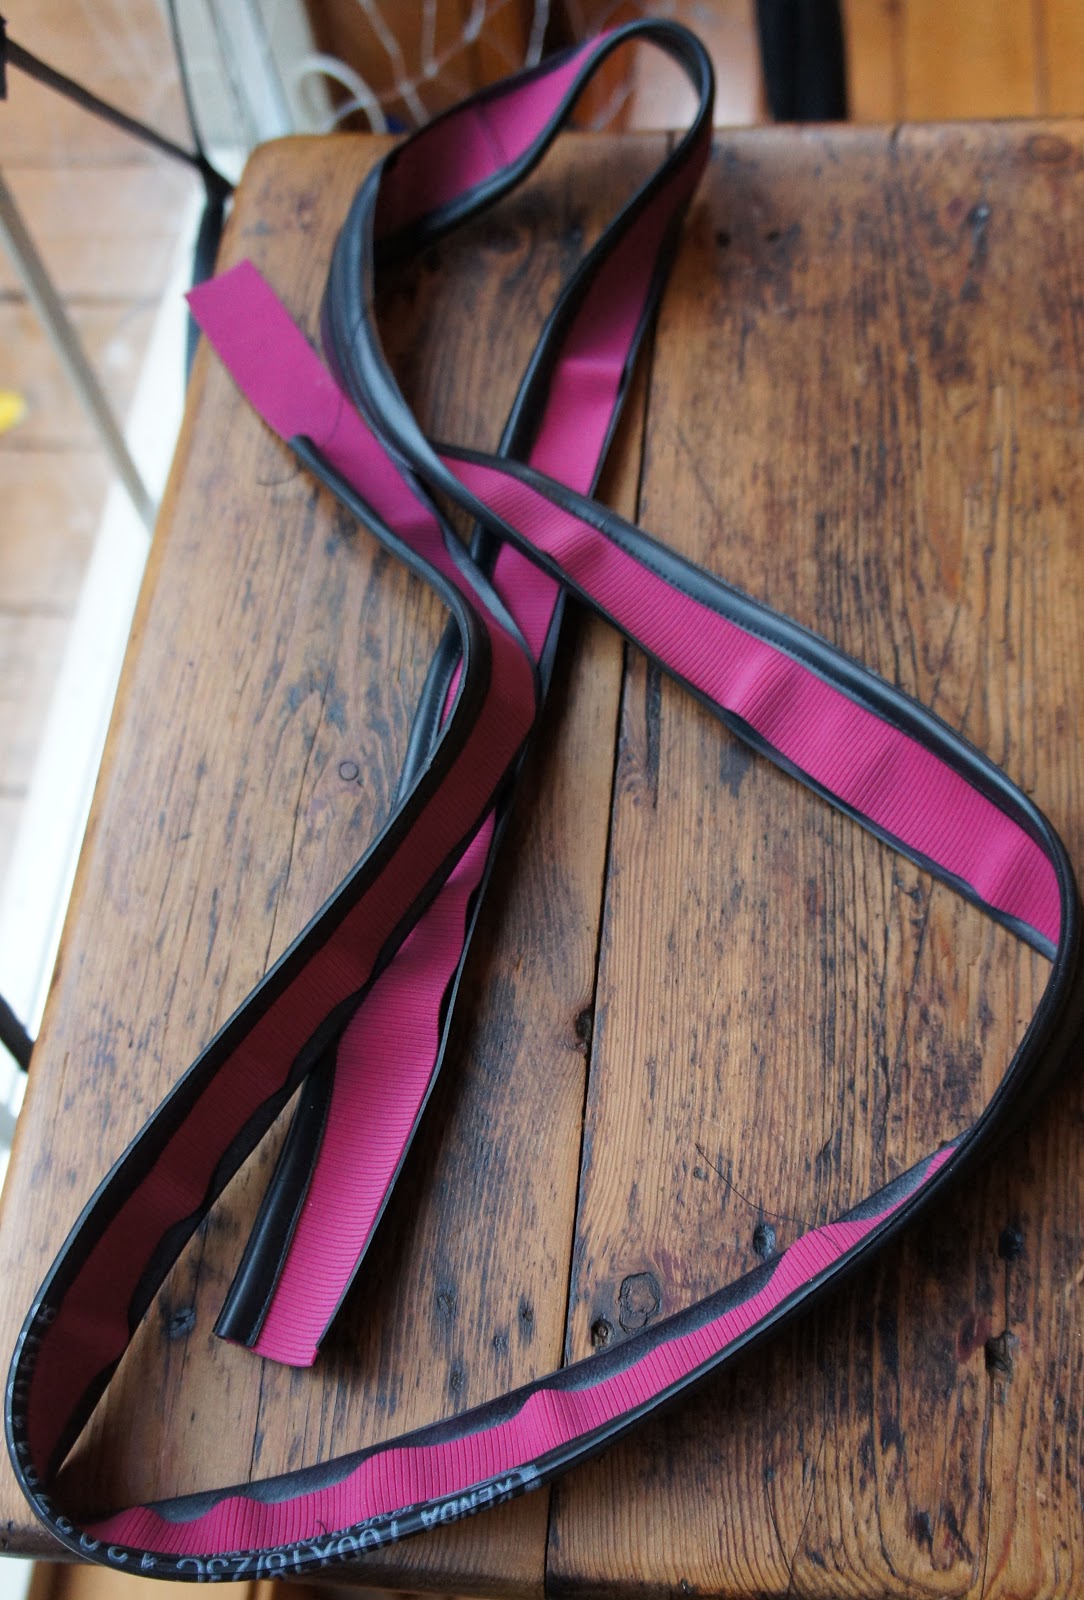
08/03-4/2012 - Rubber Choker Necklace
I know these really aren't in style, but I still think chokers are sexy. I was going to add a charm to it, but it didn't really flow. I love this red Asian-inspired fabric that I found at SCRAP to accent it though.

08/05-06/2012 - Rubber Tree
This project was much harder than I thought. I tried three different types of glue to make this work. Tires are much harder to work with than the inner tubes because they lack flexibility and are harder glue to each other. I prefer not to use anything too caustic, but I found some rubber adhesive at the hardware store. My goal is to make a giant tree in the future. I think it would need some sort of armature that I could staple or nail the rubber to.
08/07-08/2012 - Experimenting with making more Yoga Slings
My experiments looked like a crazy mess, so I am not bothering to add a picture. I was trying to create different closures than Velcro like I did for the camping bed rolls. I think if I add a little more patience and head back to the drawing board, this could work.
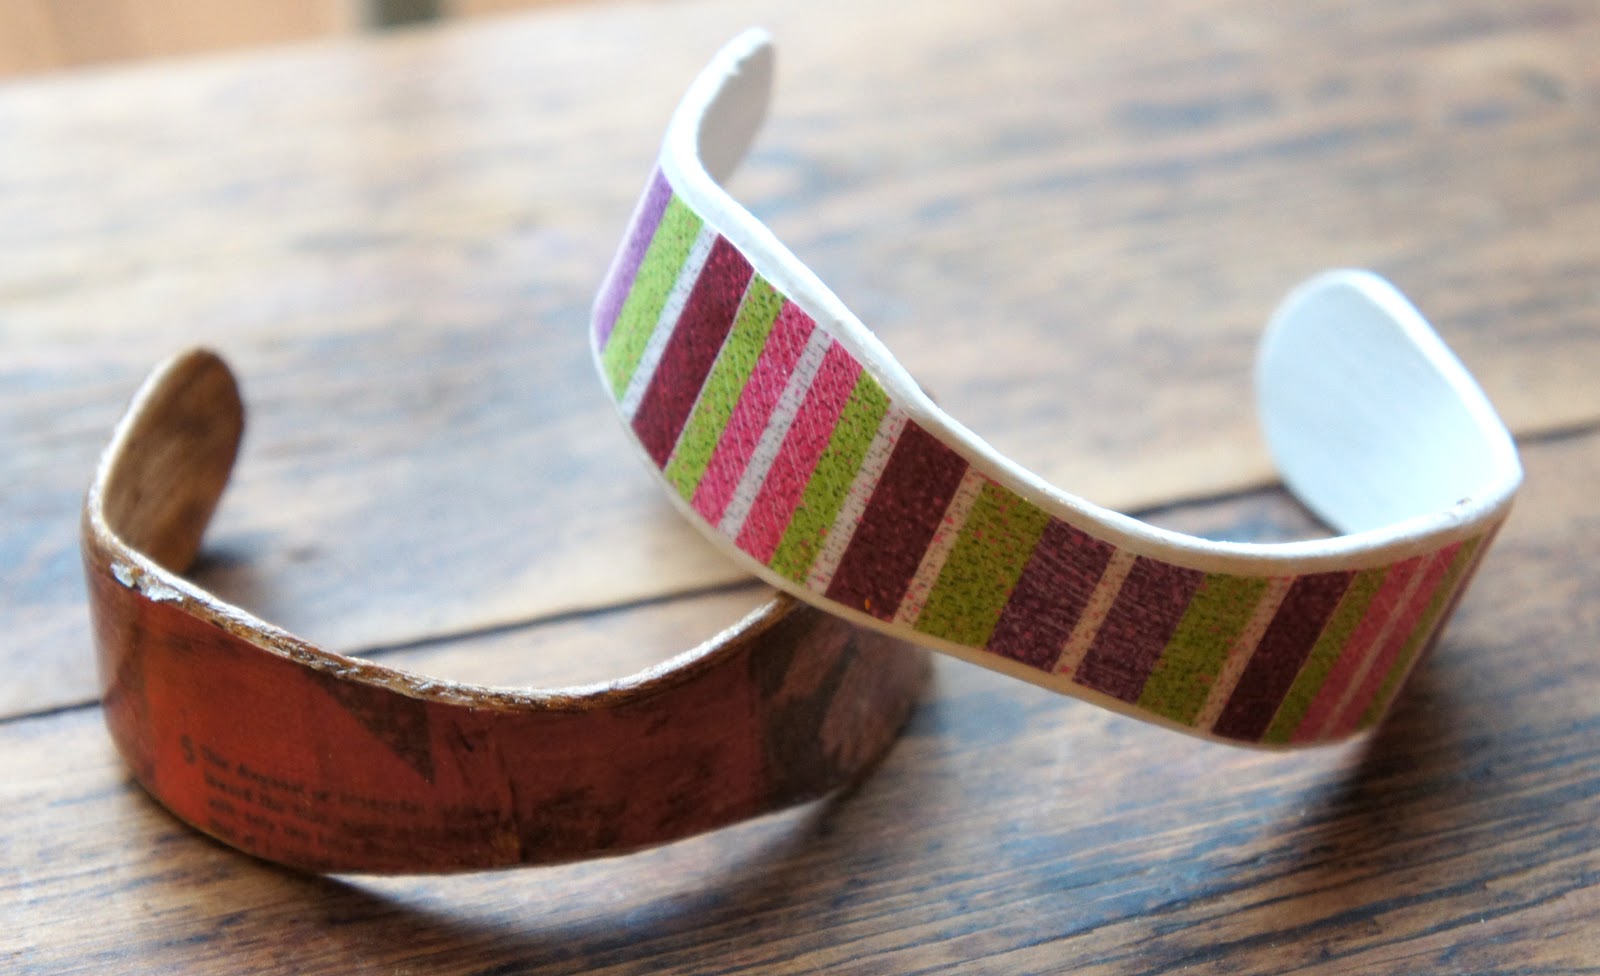
 08/09/2012 - Wallet Cuff
I feel purty darn smart for coming up with this. I made an opening in the lining of the cuff to secretly keep cash. The one issue I ran into was the shape of the inner tube that I used. It bowed out in the center a little bit, but I am excited about the concept.

 08/09/2012 - Wallet Cuff
I feel purty darn smart for coming up with this. I made an opening in the lining of the cuff to secretly keep cash. The one issue I ran into was the shape of the inner tube that I used. It bowed out in the center a little bit, but I am excited about the concept.

 08/10/2012 - BJ Purse Handle
This purse was actually Grandma BJ's Christmas present, but the handle was a little too short (I actually cut it down because I was afraid it was too long when I made it). She would still carry it around and show it off though -- I think I should have her be my publicist.


08/11/2012 - Brake Wire Tree
I made this tree by twisting apart the brake wire, then twisting it back to look like a trunk and branches. Of course, my fingers were worse for the wear when I was done. I cut little leave and poked each one through a little strand of brake wire. I really love this, but it still needs some work. Someone at work donated a tree made of brass that looked kind of like mine, so someone else also had my great idea.
I made this tree by twisting apart the brake wire, then twisting it back to look like a trunk and branches. Of course, my fingers were worse for the wear when I was done. I cut little leave and poked each one through a little strand of brake wire. I really love this, but it still needs some work. Someone at work donated a tree made of brass that looked kind of like mine, so someone else also had my great idea.
 08/12/2012 - Speaker Box
My sister-in-law and nephew, Heather and Hunter, came over again and we worked on the speaker box project we started in May. We decided to use a jigsaw to cut out the fronts of the boxes. I need to add shelves to mine and add more coats of paint, then I plan to use it as a bathroom shelf. Heather finished hers and made it look artsy and Asian-inspired.

We also entertained the kids, ourselves and great grandma by turning an old swimming pool liner into a slip and slide!
 08/13/2012 - School Supply Redux
After talking to my sister in Chicago, I decided it would be cheaper for me to buy my niece's school supplies at SCRAP and mail it to her, then for my sister to buy everything new. I got almost everything from the list that SCRAP had in stock, plus a few extras and only spent $4.88! I did a cost breakdown for SCRAP's blog: School Supplies for under $5! A few of the items had to be fixed up, like this composition notebook. Thankfully my niece likes wolves and Sierra Club keeps sending me these same exact cards over and over again. Her supply list was very specific, so I improvised with the folders as well. She needed certain colors with pockets, so I added pockets, etc.

08/14/2012 - Map Star
I enjoy doing paper crafts, but I don't think it is my strong suit. I saw instructions to make this star online, but it was in German, translated into confusing English. I struggled to follow the pictures, but I think I finally figured it out. I also used up a map I got in the mail.
 08/15/2012 - Magic Braid Rubber
Bracelet
08/15/2012 - Magic Braid Rubber
Bracelet
I got excited when I saw the Pinterest Instructions to make this "magic braid" from leather. I figured it could also work with rubber and it did! Hip hop hooray! I must say, I am proud of myself for not just pinning stuff to try, but actually doing it!

08/16-17/2012 - Wire/Rubber Basket 1
The biggest challenge in making my baskets is making a sturdy frame. I bought a pair of sturdy metal frames from SCRAP to turn into baskets. With the wood frames, I have the benefit of stapling the rubber to the wood, but that obviously doesn't work with metal. Because the rubber is so stretchy, I was able to tuck the ends under to hold them in place. They were surprisingly sturdy.
 08/18/2012 - Zoe Storage Book
Kids are so rough on books when left unattended. Zoe got this fun pop up book from one of her grandma's, but after a couple years, it was worse for the wear. I took off the cover and glued a zipper around the edges and also glued in a lining for Zoe to keep stuff in. I drilled a couple holes in the spine and pulled ribbon through for the handle. I tried using a plastic handle I had, but the spine was too thick. It is a great storage place for her stickers.

08/19/2012 - JG Bracelet
I am such a nice sister...making all this stuff for my sis, but still haven't sent it to her. Sorry, Jules, guess what will be in your Christmas package? :) I cut thin rubber strands and threaded them through some sparkly letters I got at SCRAP. I used wire to wrap the ends and make a closure.

08/20-21/2012 - Wire/Rubber Basket 2
I made the twin to the basket I made a few days earlier. That's all I got.
 08/22/2012 - Doll Arm Jewelry
Hangers
08/22/2012 - Doll Arm Jewelry
HangersThese are one of my favorite things I have made. I bought some random doll arms at SCRAP and found some wood samples and attached them to make little jewelry hangers. I am still trying to figure out my fascination with doll parts. Kind of creepy and cool all wrapped together.
08/23/2012 - Cycling Dream Catcher
UPDATE 4/4/17 - I have removed this photo and craft. At this time, I was oblivious to the fact that creating dream catcher crafts is not appropriate for a non-Indigenous person. Dream Catcher are an important part of what defines Native Americans.08/24/2012 - Film Canister Salt and Pepper Shakers
 I was so excited to use these for our camping trip. Really, how brilliant, film canisters that were the corresponding colors. Not so great when I went to season food while outdoor cooking though. I didn't drill the holes big enough so I just popped the lids of and sprinkled salt and pepper on the food. I am still giving myself kudos for this one though.
08/25/2012 - Zoe Number Tin
We were preparing to take our 3 year old on a 4 hour car ride to camping, so I thought it would be fun to make her a little magnetic number game. First things first -- decorate a cute tin to put it in! I used an old calendar picture and Mod podged it onto the top of an Altoids tin.
08/26/2012 - Game Piece Magnets
08/26/2012 - Game Piece Magnets
 I took some old rounded game pieces and glued magnet circles I had cut to the backs for the number tin. At first I tried to paint letters and numbers onto the pieces, but the plasticy blue color made them hard to see. I painted each piece silver then added numbers to them. As you can see there a few numbers missing and a few went AWOL somewhere in the car. It did manage to keep Zoe entertained for quite a while.
08/27/2012 - Crocheted Rubber Circle
I can knit and crochets straight lines for days (but that is about it) and have been wanting to try crocheting rubber into circles. I practiced for many hours on the car ride to our camping trip using regular yarn before I started with rubber. It took me quite a few hours to get this much done, so I need to keep practicing with yarn.

08/28/2012 - SCRAP Kite
Since we were camping on the Oregon Coast, I thought it would great fun to get Zoe a kite. I bought one from SCRAP and Zoe and I decorated it to fly at the beach. The kite achieved about 3.2 seconds of air time before the harsh coastal winds beat it out of the sky. Lesson learned - little plastic kites are no match for the Pacific Coast.
 08/29/2012 - Crocheted Bracelet
I was feeling pooped and defeated from my lack of success with the kits and rubber circle, so I made myself a crocheted rubber bracelet on the car ride home. I also made Jason stop on the side of the highway so I could grab some blown tires for my OMSI project (but didn't end up using). I should join a roadside clean-up crew though, there is some interesting stuff out there!
 08/30/2012 - Chain and Bead Bracelet
Breaking chains is surprisingly difficult. Jason got me a heavy duty bike chain breaker, but it is still slow and tedious and leaves my hands filthy. I just love the shapes of the pieces though and enjoy incorporating them into things. I have been thinking about making a bracelet like this for a few years now, I have finally done it! Hoorah!

08/31/2012 - Rubber Chain Strand Bracelet
This has become one of my favorite bracelets to wear. I cut really thin strips of rubber and spaced out the chain links on it. I used aluminum wire to wrap the ends and added a clasp. I think I need to upgrade the wire I am using though.


