I don't know if the proper term for this is "cuff" or "cufflet" so I will go with cufflet because it sounds fancier. The black fabric is sexy fabric I found at
SCRAP, one of my favorite places in Portland. They take donations of scrap material from businesses and individuals and resell it to fund their school and community programs. The place is an artist's/teacher's/crafter's/garbage picker's (me) dream come true. I am going next week to start my volunteer training, hooray!
Recycled Material: aluminum can,
SCRAP fabric, old ribbon
Other Material: decorative brads
Tools: scissors, ruler, X-acto knife, Crop-A-Dile, double-sided tape, rubber electrical tape
How I did it: I cut the top and bottom off the aluminum can then cut a vertical line to open the can body.
There is usually a line down the side of the can by the nutritional information and the print overlaps that I use as a guide to cut a straight line. I cut the can body so it was about 3.25" in height and left the length of the can, about 8" to fit my wrist. I marked the aluminum horizontally down the center .5" apart for placement of the brads, used the X-acto to poke little horizontal notches on the marks, and inserted the brads. I used the electrical tape to hold the brads in place on the back of the aluminum. I folded the top and bottom of the aluminum down towards the front a little less than .5", but did not press the aluminum all the way down until the fabric was attached. I cut the fabric 2 inches larger than the aluminum to have room for the edging. I lined the double-sided tape under the aluminum fold, taking care to make sure none would be sticking out from under the fold. I tucked one edge of the fabric under the fold so the back of the fabric stuck to the tape then wrapped the fabric over the back of the aluminum. I applied the double-stick tape to the bottom fold and then trimmed down the fabric a bit to make sure the fabric would be flush with the fold when I tucked it under the aluminum. I pressed the folds flat with my hands, but pliers can be used, which helped hold the fabric in place and to make sure it adhered to the tape.
The short ends of the cuff were too thick to fold so I used the rubber electrical tape to cover the edges. I used the Crop-A-Dile to punch 3 holes and set 3 eyelets on each end of the bracelet. The final thing I did was to lace the bracelet like a corset (or shoe, but corset sounds saucier) and tie it off.
What I would do differently: My original plan was to try to stitch the fabric to the aluminum, but I got sidetracked watching Wall•E with my family and ended up making it by hand. I still need to experiment sewing on aluminum, so that will have to happen with another project. There seem to be many things I would have done differently with this project. I don't think it was necessary to do the fold down, other than it give the fabric and tape a stronger hold. I need to use a better eyelet next time, but I used up the ones I had left. The ribbon does seem like overkill for this bracelet, so I will most likely change it out regardless. I chose the blue fabric scrap to pull out little accents of clue from the fabric, but the piece I ended up cutting didn't have blue on it.
 I was determined to make this bracelet work. I wouldn't call this exactly a successful project, but it is the general idea of what I wanted to accomplish. From what I understand, aluminum cannot be soldered and I believe welding a small aluminum tab would just melt it, so I am on a quest to find a way to hold these pieces together and super glue was just my temporary solution.
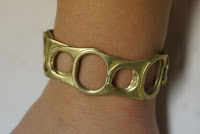
  Reclaimed Material: aluminum pull tab


